This post may contain affiliate links. Please read our disclosure policy.
Learn how to make a moist yet soft and airy butter cake with a texture similar to a sponge cake. All the tips you need and video tutorial are included.
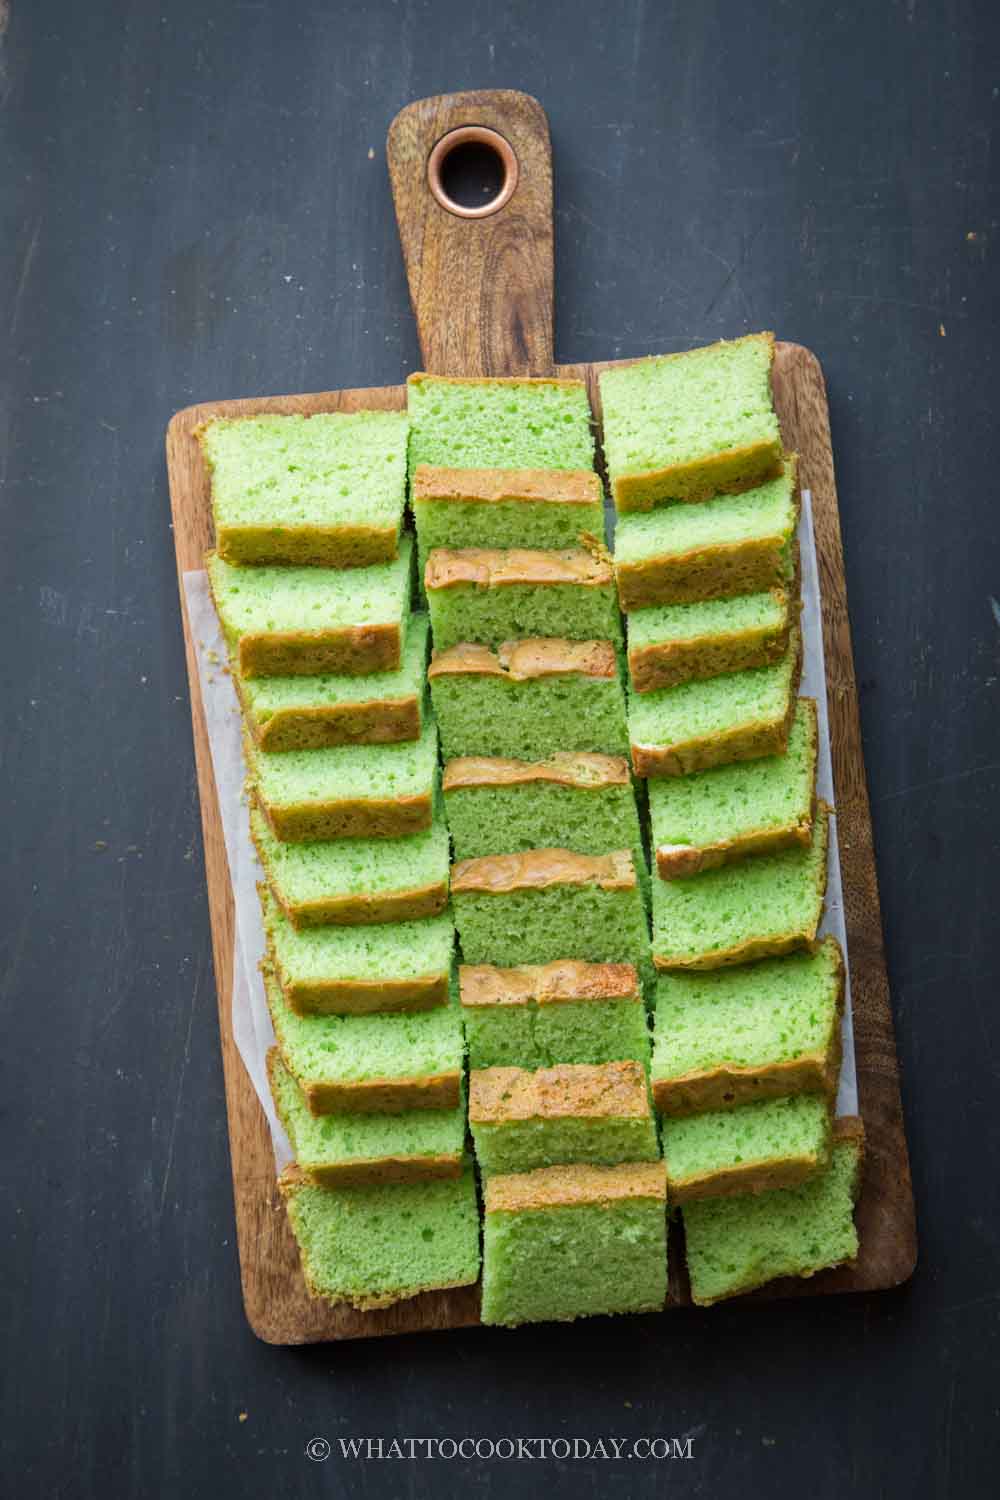
I have always curious about Mrs. Ng SK butter cake ever since I read about it from Table For 2 or more. This amazing butter cake recipe was shared by her from Mrs. Ng, who goes to the same church and often bakes for church events (lucky people!). I think this has been shared over and over on the internet by food bloggers so many times and it just kinda went viral on its own (for good reason!). So, I gotta really try it out myself to see what the fuss was all about and it surely lives up to its reputation. If I were to bake a butter cake as an edible gift for someone, this is the recipe I will use!
The recipe rundown
1. Taste: Not cloyingly sweet (I cut down a bit on sugar) and buttery. So amazing! My kids got hooked immediately
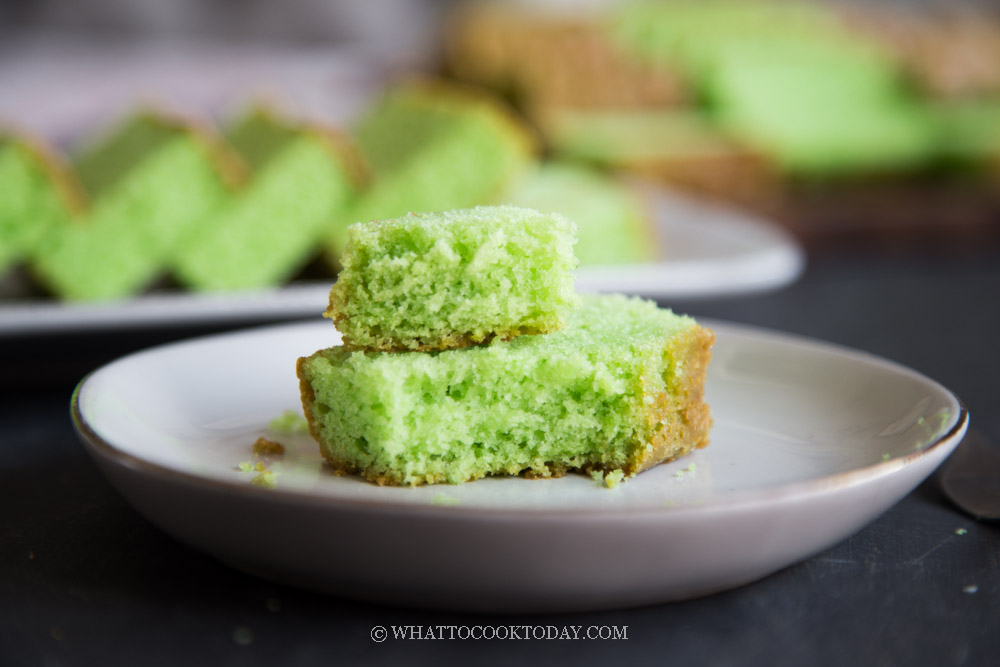
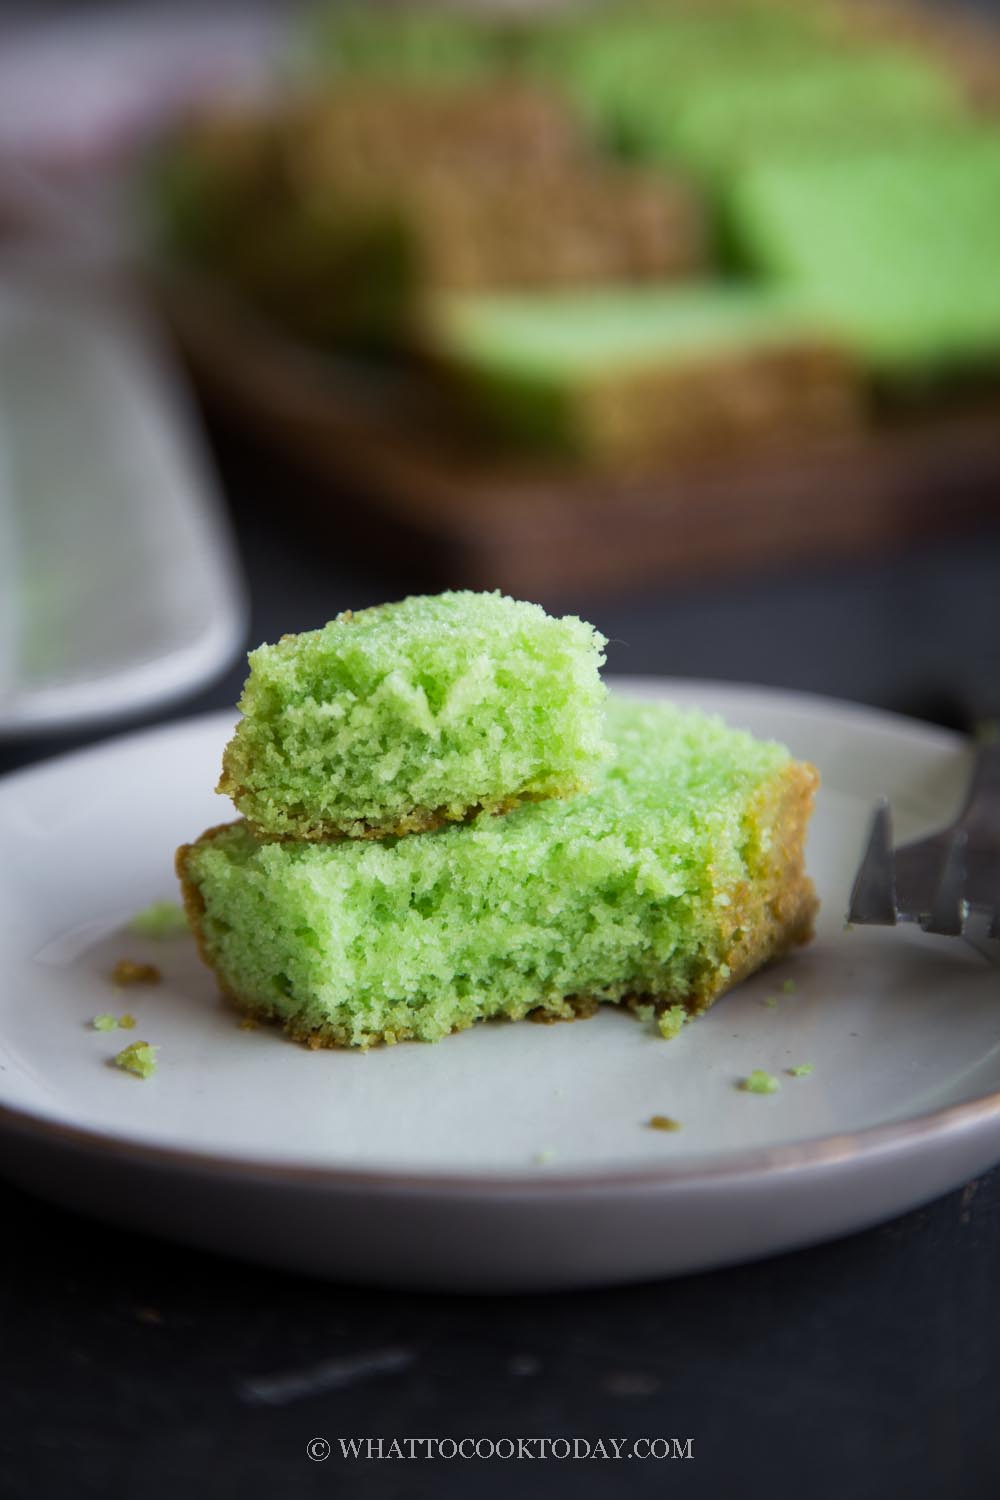
2. Texture: So soft and airy similar to sponge/chiffon cake. It tastes a bit dry on the same day you make it, but if you can wait for the flavor to develop the next day, you are IN for an even better taste
3. Level: Medium
4. Pros: No one will be disappointed 🙂
5. Cons: It’s hard to eat just one slice, don’t say I didn’t warn you 🙂
Why I love Mrs. Ng SK butter cake?
1. LOVE that texture
I’ve told you guys that I’m a huge chiffon/sponge cake lover. Mrs. Ng’s butter cake reminds me of chiffon cake in some way. It’s not airy like chiffon cake, but it’s so light and you just don’t believe that it’s actually a butter cake, BUT I know it’s a butter cake because of the amazing buttery aroma!!
2. The ingredients are simple
You only need butter, eggs, flour, milk, baking powder, salt, vanilla extract as basic ingredients. Those are all basic pantry items that most people have
3. Recipe can be adapted to a different flavor
I’m sharing the pandan version here, but I have tried other flavors like orange, chocolate marble, and Nestum version too. They were all so good!
Butter cake with an egg separation method (sponge method)
Unlike the typical moist and denser butter cake, Mrs. Ng’s butter cake is the complete opposite, thanks to the egg separation method: beating the egg whites and egg yolks separately. Does this worth the extra effort? I very much believe so. The advantage of the egg separation method on this cake:
1. Light and airy texture
2. Flat cake surface (instead of a dome shape), as long as you follow the recipe and the pan size for the cake
Ingredients
1. Salted butter
The original recipe calls for salted butter. I only have unsalted butter so I include salt in the recipe
2. Eggs
I used large eggs (58-60 grams with a shell)
3. Granulated sugar
You can also use caster sugar
4. All-purpose flour
The original recipe calls for self-raising flour (which includes salt and baking powder). I don’t usually stock self-raising flour, so I just add baking powder
5. Baking powder
You can omit this if you use self-raising flour
6. Salt
I added this because I use unsalted butter and all-purpose flour
7. Milk
I used coconut milk. You can use cow’s whole milk (full-cream milk)
8. Pandan extract
Since I’m doing pandan flavor, I added pandan extract for extra flavor and color. If you are doing original flavor, add vanilla extract
Tips for success
1. Room temperature ingredients
Eggs and milk need to be at room temperature. The butter needs to be softened (but not melting). Prepare a large bowl of ice water in case it’s really hot where you are and the butter started to melt when you are halfway creaming the butter and eggs
2. Clean and oil-free bowl for whipping meringue to stiff peak
3. Flour to use
I personally like all-purpose flour or self-raising flour. To me, butter cake should have a bit more “body” and not soft and spongey like chiffon or sponge cake. But it’s a personal preference. You are welcome to use cake flour, it would be more like a chiffon cake in texture (and no, there’s nothing wrong with that, just a personal preference)
4. Don’t cut down on the butter and sugar
I know it’s a lot of butter, but I recommend not cutting down on it. This is a butter cake that you will not feel like the cake is greasy at all, which is kinda deceiving ha..ha..! but you know what I mean. The sugar is not just to sweeten the cake. Sugar is like part of the “liquid” portion of the formula and it helps to keep the cake moist and gives structure to your meringue
5. Make sure you use acid or cream of tartar to whip the meringue
Because we need to beat the yolks and the whites separately using a mixer, the egg whites really need to be stabilized while waiting for you to cream the butter, sugar, yolks, etc. My meringue nicely firm and stiff even when it has to wait for maybe 5 minutes or so? while I was creaming the butter
6. If you only have one bowl
Do the meringue first and then gently transfer to another bowl. You can then use this same bowl without washing to cream the butter and sugar. Don’t cream the butter first and then do the meringue? Why? the bowl is full of grease already and you need to wash it really well, dry it well, then only can beat the meringue. While it’s doable, it’s just extra unnecessary work when you don’t have to
7. Pan size matters
The recipe is perfect for the pan size. Butter cake isn’t supposed to be a “tall” cake. If you use a pan that is too small with this recipe, the butter might separate and it will show in your finished product
8. Pan quality
I use a good-quality thick aluminum pan. A thin pan will tend to overbake the cake batter and makes your cake brown too fast and you end up with drier and tougher cake
9. Accuracy of your oven temperature
If you keep having problems with your oven, I recommend getting an oven thermometer. It is inexpensive and place the thermometer near where you put your baking pan. This way you know exactly whether you need to adjust the temperature higher or lower
How to make Mrs. Ng SK butter cake with pandan coconut flavor
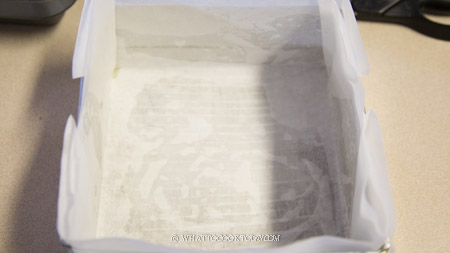
1. Grease the bottom and sides of your pan with a bit of oil or cooking spray. Line with parchment paper on all sides for easy removal, the oil or cooking spray helps to keep the paper on the spot
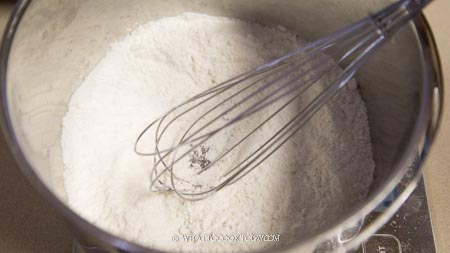
2. Mix the flour, salt, and baking powder in one bowl and whisk to mix
3. Make sure the bowl is oil-free. Whisk on a medium speed (speed 6 on Kitchen Aid) using a whisk attachment, until the egg whites are frothy. about 1-2 minutes. Add the acid or cream of tartar and continue to beat for another minute. Gradually add sugar in 3 batches, wait about a minute for each batch
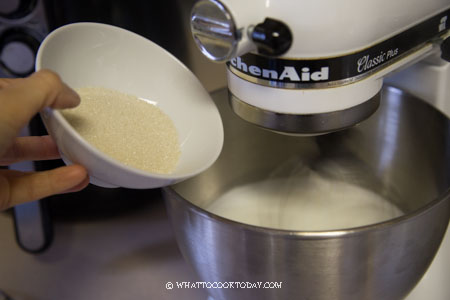
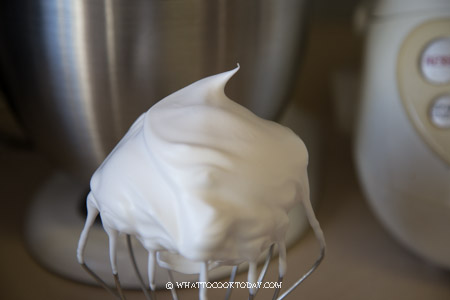
4. Once all the sugar is in, increase the speed to high (speed 8 on Kitchen Aid) and whip the meringue until it is glossy and stiff. When you lift the whisk up, the meringue stays in shape. If you tip the bowl upside down, the meringue doesn’t drop
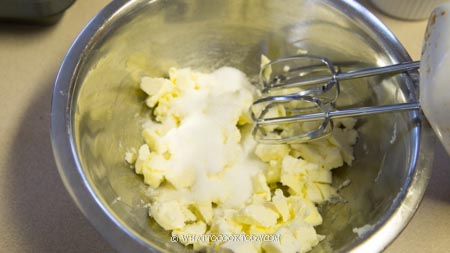
5. Preheat oven to 340 F (170 C) for a conventional oven. (bottom heat). If you only have one mixing bowl for your stand mixer, transfer the meringue out to another clean bowl. You don’t need to wash this bowl you use to whip meringue earlier, add softened butter and sugar. Use a paddle attachment (for a stand mixer) and cream butter and sugar until they are pale and creamy (speed 4 on Kitchen Aid).
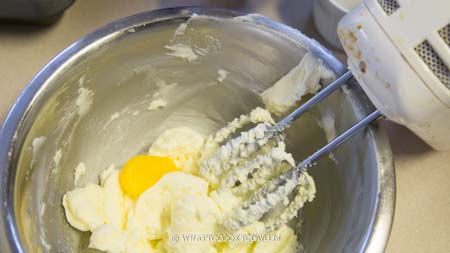
6. Add egg yolk one by one, make sure it’s well combined before adding the next one. Stop to scrape the sides of the bowl if needed. If the temperature is really hot where you are, and the butter started to get melty, you can put your mixing bowl on top of ice water and continue to mix
7. Lower the speed to low. Add half of the flour mixture and mix until barely combine, you still see some flour, add 1/2 of the milk and mix at low speed until almost combined.
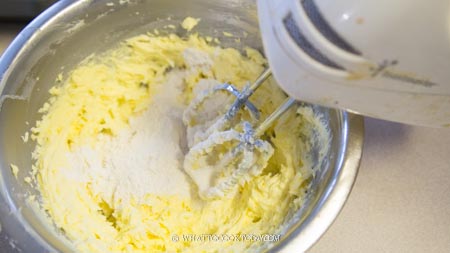
8. Add the rest of the flour mixture and mix until just barely combined again followed by the rest of the milk and pandan extract, and mix again until almost combined. Stop the machine and use a spatula to manually scrape the side of the bowl and gently fold everything until you don’t see a loose white flour mixture. Take care not to overmix or your cake will be dense. The batter is very thick at this point
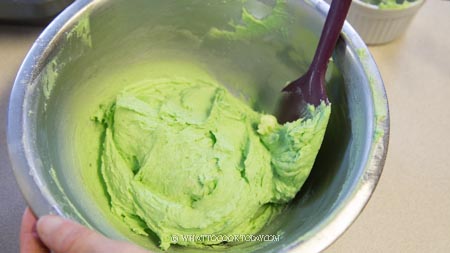
9. Take 1/3 of the meringue and put it into the cake batter

10. Turn on the machine at low speed to mix it until you barely see the white meringue anymore. This initial mixing with a mixer will help the next folding easier to combine.
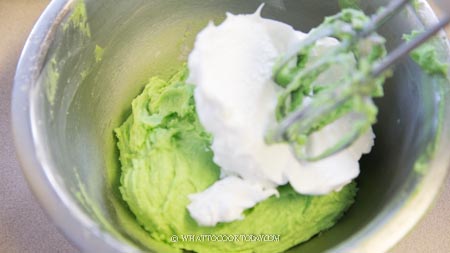

11. Then turn off the machine and manually using a spatula to FOLD in the next 1/3 of the meringue by using the cutting method. Cut into the middle and fold over. Continue until you use up all of the meringue. Work gently but quickly
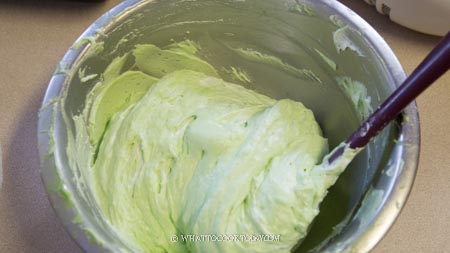
12. Pour batter into the prepared pan. The batter is thick so you need to use a spatula to smooth the top

13. Drop the cake pan from about 4-5 inches height on the counter 3-4 times to pop large air bubbles. You can also use a skewer or chopstick to run through the cake to pop the air bubbles

14. Put the cake pan in the middle of the oven and bake for 20 minutes and then reduce the temperature to 300 F (150 C) and bake for additional 25-30 minutes or until a cake tester comes out clean. My cake browns too fast and that’s why I have to lower the temperature. This is for my oven. You may be able to bake at 340 F (170 C) for 45 minutes without lowering the oven temperature. You will have to observe this yourself

15. Once the cake is done, remove it from the oven. Bang the cake pan 2-3 times on the counter. This minimizes shrinkage. Let it cools down on the pan for 5 minutes
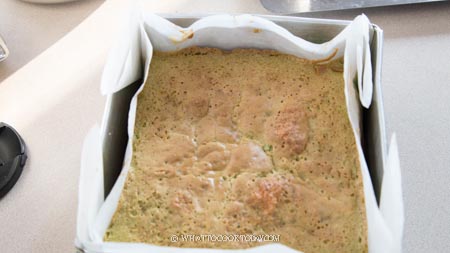
16. Then gently pull the parchment paper to lift the cake out onto a cooling rack. Peel the parchment paper off from the sides and let the cake cools off completely before slicing
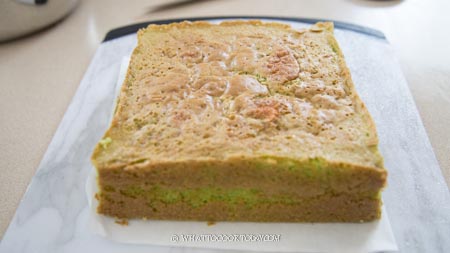
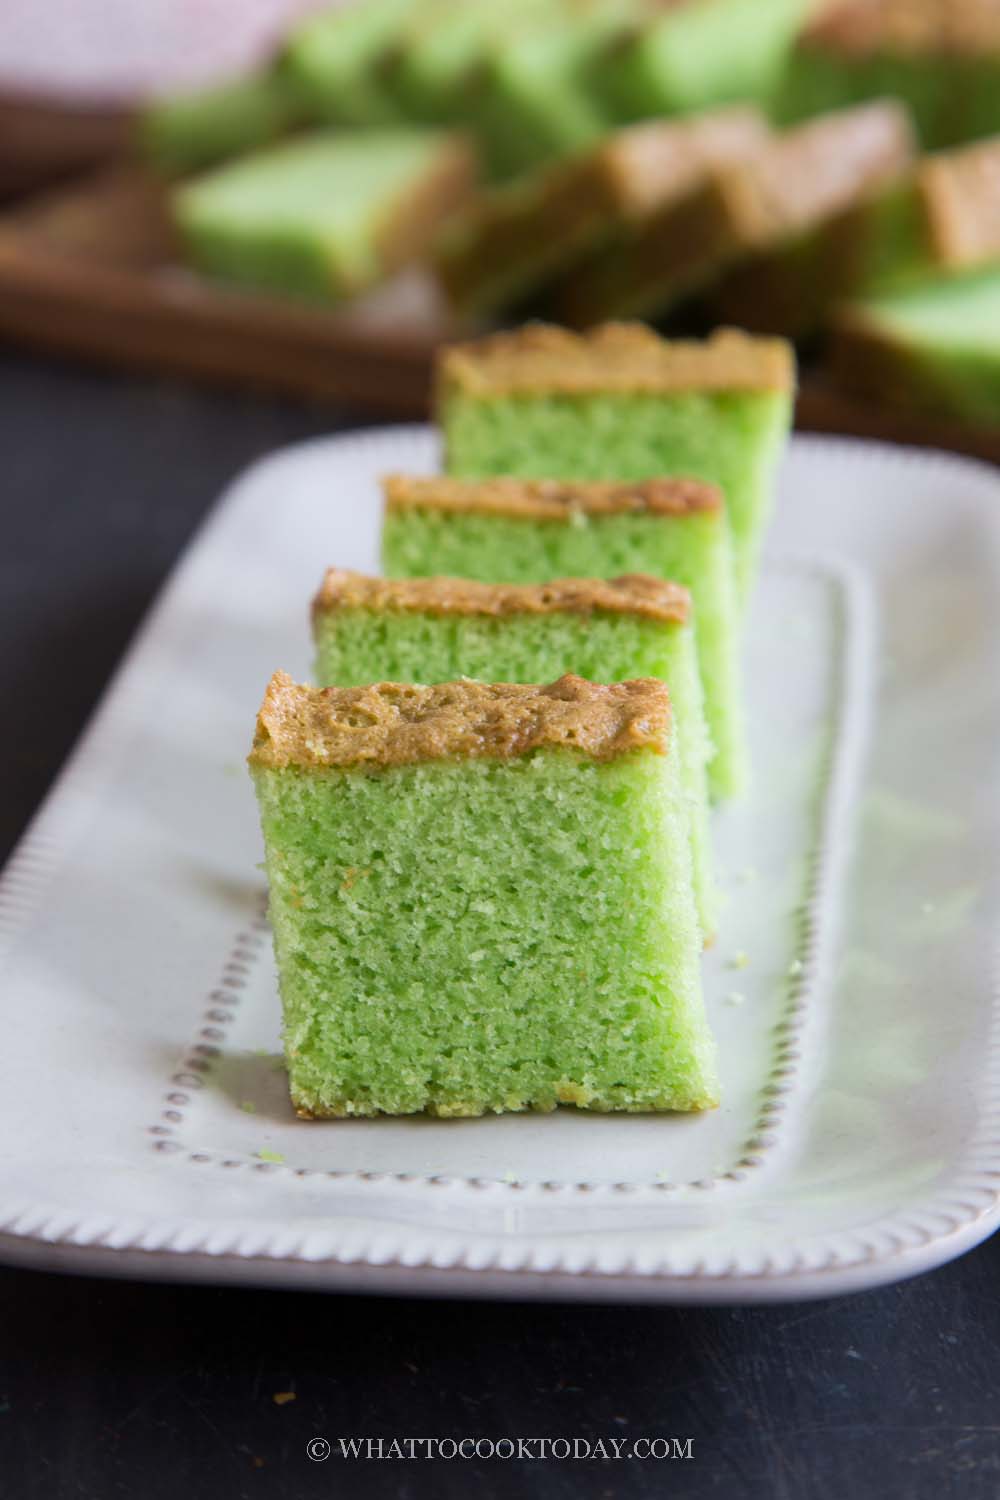
The cake tastes the best the next day onwards
Now, the hardest part of all this is asking you to wait for the next day to serve if it’s possible at all 🙂 Why you would ask? You can serve it on the same day, but you may find it a bit dry at first. Here’s why:
1. Taste
Especially with a high-fat content cake like this, the butter hasn’t had a chance to really “soak” into the flour and combine with other ingredients to evenly distribute the flavor
2. Texture
For the same reason as number 1, the butter hasn’t really soaked into the cake. The moisture hasn’t evenly distributed yet and that’s why you may find it a bit on a dry side when you serve this on the same day. You will notice the pandan flavor will be stronger too after few days
So, have I convinced you to wait? LOL
Recipe is adapted from Table for 2 or more with some modifications.
Did you make this recipe?
I love it when you guys snap a photo and tag to show me what you’ve made 🙂 Simply tag me @WhatToCookToday #WhatToCookToday on Instagram and I’ll be sure to stop by and take a peek for real!
You may like these butter cakes
Mrs. Ng SK Pandan Butter Cake Recipe (Singapore Butter Cake)
Ingredients
For 7-inch square or 8 inch round cake pan:
For cake batter:
- 170 gr unsalted butter
- 100 gr granulated sugar
- 55 gr egg yolks from 3 large eggs (about 18 grams each yolk)
- 135 gr all-purpose flour
- ½ tsp salt
- ⅓ tsp baking powder
- 45 ml coconut milk
- ¾ tsp pandan extract see notes
For meringue:
- 90 gr egg whites from 3 large eggs (about 30 grams each egg white)
- ½ tsp lemon juice or cream of tartar or vinegar
- 40 gr granulated sugar
For 8 x 8 inch square or 9 inch round cake pan:
For cake batter:
- 230 gr unsalted butter
- 150 gr granulated sugar
- 72 gr egg yolks from 4 large eggs (about 18 grams each yolk)
- 180 gr all-purpose flour
- 1 tsp salt
- 2 tsp baking powder
- 60 ml coconut milk
- 1 tsp pandan extract see notes
For meringue:
- 120 gr egg whites from 4 large eggs (about 30 grams each egg white)
- ½ tsp lemon juice or cream of tartar or vinegar
- 50 gr granulated sugar
Instructions
- Preheat oven to 340 F (170 C) for a conventional oven (bottom heat). If you use convection oven, consider lowering the temperature by 20 F or 15 C.
- Separate the egg yolks from the whites when they are still cold. It's easier. Then let the eggs, butter, and milk come to a room temperature, about 30 minutes before you plan to start making the cake. If it's warm where you are, you may not even need that long
- The butter should be soft, but shouldn't be melty. You should be able to easily mash it. If it's shiny and wet, the butter is too soft.
- Measure the flour, sugar, and the rest of the ingredients. Grease the bottom and sides of your pan with a bit of oil or cooking spray. Line with parchment paper on all sides for easy removal, the oil or cooking spray helps to keep the paper on the spot
- Mix the flour, salt, and baking powder in one bowl and whisk to mix
Start by beating the meringue first:
- Make sure the bowl is oil-free. Whisk on a medium speed (speed 6 on Kitchen Aid) using a whisk attachment, until the egg whites are frothy. about 1-2 minutes. Add the acid or cream of tartar and continue to beat for another minute. Gradually add sugar in 3 batches, wait about a minute for each batch. Once all the sugar is in, increase the speed to high (speed 8 on Kitchen Aid) and whip the meringue until it is glossy and stiff. When you lift the whisk up, the meringue stays in shape with a slight bent on the tip. Don't overbeat the meringue too or it will break
Prepare cake batter:
- If you only have one mixing bowl for your stand mixer, transfer the meringue out to another clean bowl. You don't need to wash this bowl you use to whip meringue earlier, add softened butter and sugar. Use a paddle attachment and cream butter and sugar on medium-high (speed 6 on Kitchen Aid) for about a minute or two or until they are pale and fluffy .
- Lower the speed to 4 and add egg yolk one by one, make sure it's well combined before adding the next one. Stop to scrape the sides of the bowl if needed. If the temperature is really hot where you are, and the butter started to get melty, you can put your mixing bowl on top of ice water and continue to mix
- Lower the speed to the lowest. Add 1/3 of the flour mixture and mix until barely combined, you still see some flour, add 1/3 of the milk and mix at low speed until almost combined. Add the rest of the flour mixture and mix until just barely combine again followed by the rest of the milk and pandan extract, and mix again until almost combined. Stop the machine and use a spatula to manually scrape the side of the bowl and gently fold everything until you don't see a loose white flour mixture. Take care not to overmix or your cake will be dense. The batter is very thick at this point
Fold egg whites into the cake batter:
- Take 1/3 of the meringue and put it into the cake batter and turn on the machine at low speed to mix it until you barely see the white meringue anymore. This initial mixing with a mixer will help the next folding easier to combine. Then turn off the machine and manually using a spatula to FOLD in the next 1/3 of the meringue by using the cutting method. Cut into the middle and fold over. Continue until you use up all of the meringue. Work gently but quickly
Bake:
- Pour batter into the prepared pan. The batter is thick so you need to use a spatula to smooth the top. Drop the cake pan from about 4-5 inches height on the counter 3-4 times to pop large air bubbles. You can also use a skewer or chopstick to run through the cake to pop the air bubbles
- Put the cake pan in the middle of the oven and bake for 20 minutes and then reduce the temperature to 300 F (150 C) and bake for additional 25-30 minutes or until a cake tester comes out clean. My cake browns too fast and that's why I have to lower the temperature. This is for my oven. You may be able to bake at 340 F (170 C) for 45 minutes without lowering the oven temperature. You will have to observe this yourself
- The cake will dome slightly during baking but it shouldn't dome AND crack. There shouldn't be any crack. Don't be alarmed by the dome shape. This will flatten up when you cool the cake down
Cool down:
- Once the cake is done, remove it from the oven. Bang the cake pan 2-3 times on the counter. This minimizes shrinkage. Let it cools down on the pan for 5 minutes and then gently pull the parchment paper to lift the cake out onto a cooling rack. Peel the parchment paper off from the sides and let the cake cools off completely before slicing
- The cake will shrink a little bit and it's normal. The top will be more wrinkly due to the shrinkage, but that's not an issue
Serving:
- I HIGHLY recommend slicing and serving the cake the next day if you can. Once it has cooled down completely. I remove the parchment paper and cover it with cling wrap and leave it at room temperature for the next day. Trust me, it's worth the wait. I tried the cake on the first day before (because I was impatient and couldn't wait to try it) and both hubby and I thought the cake was a bit, just a bit dry, though still very delicious. The next day, we notice the cake has developed even better flavor and so much moister but still light and soft
- Slice the cake with a serrated knife and cut in a sawing motion so you won't be squishing the cake



8 comments
I cooked it..and it tastes very good..it is moist and firm..
It becomes my dad’s favourite. My dad is 96 years old..he loves it
Hello Agung, wow…it’s an honor to get your dad’s approval for this recipe! Happybto know that he enjoyed it:)
Hi. Can I use a Nordic Bundt spiral cake pan to bake this pandan cake. Thank you also for the tips given in the receipe.
Hi Clara, you should be able to. Depending on the size of your pan, you may need to adjust the recipe amount accordingly though.
Hi, I have just tried this recipe, following your requirements on ingredients and method. My cake turned out very crumbly, although it tasted nice. What did I do wrong? Thanks.
Hello, I’m sorry you had trouble with the cake. Was it moist and crumbly or dry and crumbly? I’m just wondering if there is a possibility of overbaking or it could also be overbeating the eggs and meringue that caused the crumbly texture.
hi ,
I just wanted to know if i do not put in the meringue but just beat in the eggs one by one? i like very moist and dense cakes and dont seem to like chiffon texture.tr
Hi, yes, you can cream the butter and sugar as directed in the recipe. You can beat all the eggs in separate bowl with a fork until they are combined and then slowly add this beaten eggs into the creamed butter and sugar. I recommend doing it this way then cracking eggs one by one into the butter mixture. I hope this helps!