This post may contain affiliate links. Please read our disclosure policy.
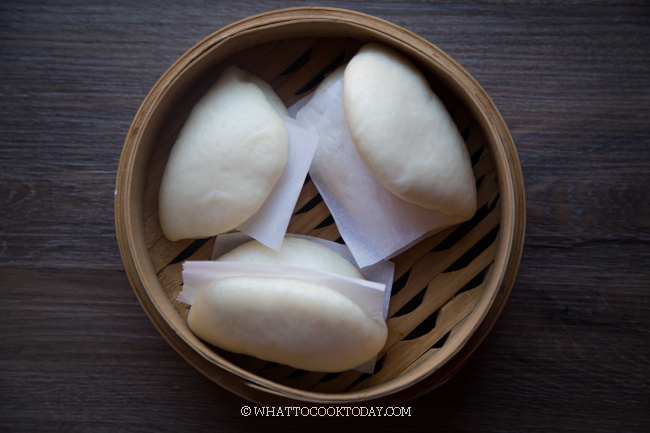
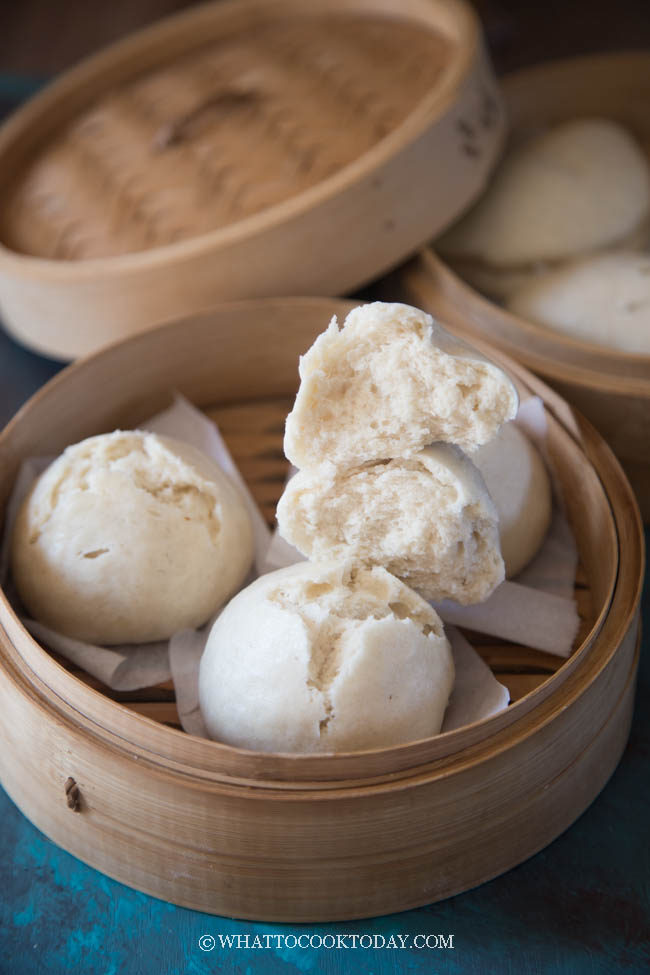
Learn how to make soft and fluffy lotus leaf buns (he ye bao) which are also known as gua bao buns (momofuku bao buns). I’m showing how to make them in three different styles.

What is lotus leaf steamed bun?
Lotus leaf buns are basically the same with regular bao buns/steamed buns. They are distinguished by their shape resemblance to the lotus leaf. The buns are usually folded over. I used my basic soft and fluffy Asian steamed bun recipe to make these lotus leaf buns. I wrote in more detail how to make a soft and fluffy steamed bun in that post if you are interested in reading more about it.
3 DIFFERENT STYLES FOR LOTUS LEAF STEAMED BUNS
Shape 1: Just a simple fold-over steamed buns
Shape 2: Fold-over with some lines

Shape 3: Fold-over with more lotus-leaf details

How to make lotus leaf steamed buns
I used my Basic Chinese Steamed Buns Recipe to make this lotus leaf steamed bun.
1. Place the flour, instant yeast, sugar, and cooking oil in a mixing bowl. If you are using a stand mixer, use a dough hook attachment. Add cold milk or room-temperature water. Add cooking oil. You may need to add more milk/water if the dough is still a bit dry. Add more teaspoon by teaspoon until the dough comes together and continue to knead for 5 minutes. Continue to knead for 10-12 minutes on speed 2 until the dough is smooth. There’s no need to reach a windowpane stage.
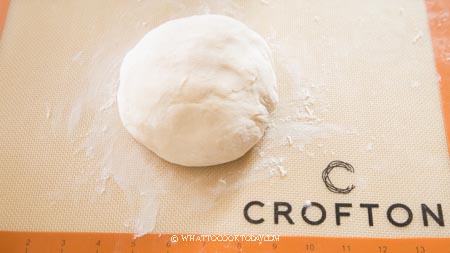
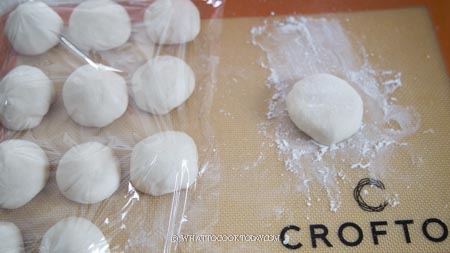
2. Cover and rest the dough for 15 minutes. This is not to proof the dough. It shouldn’t double in size. This is to relax the gluten for easier shaping and rolling the dough. Divide the dough into 12 equal portions. Keep the dough balls covered to prevent drying out. Work with one dough at a time. Pull and tuck the dough from top to bottom so the seams are at the bottom and the surface is relatively smooth
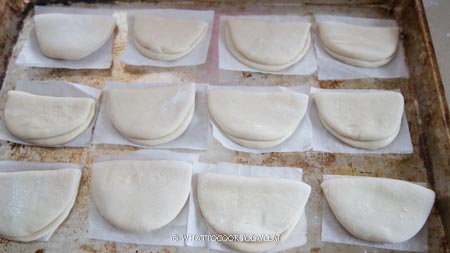
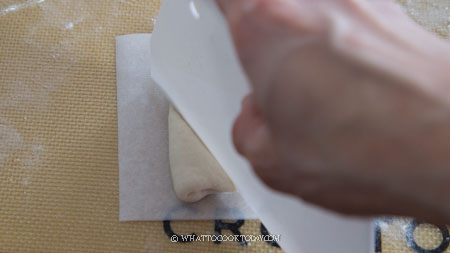
3. Shape 1 (fold-over with no design): Flatten the dough ball with your palm and use a small roller to roll it out into an oval shape, brush with some oil

Then fold the buns over to form a half circle. Put on top of parchment paper square. Put on a baking tray and keep them covered with a lightly damp cloth while you work on the rest
4. Shape 2 (fold-over with lines design): Same as shape 1 above and then use a bench scraper and make several line indentations on the surface (refer to photo). Put on a baking tray and keep them covered with a lightly damp cloth while you work on the rest

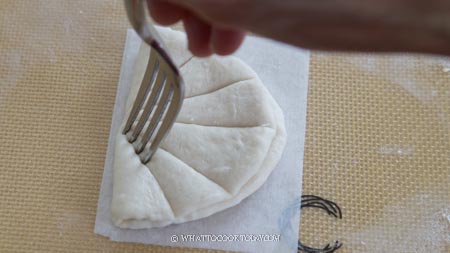
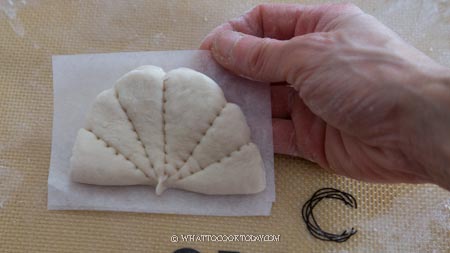
5. Shape 3 (fold-over with lotus leaf design):Same as shape 2 above and then use the tines of a fork to gently poke the buns following the line indentations you make earlier. Use a chopstick to gently push the edge of the dough inside to create a curve along the edge of the dough. Gently pinch the straight side of the bun to create the “stem” . Put on a baking tray and keep them covered with a lightly damp cloth while you work on the rest
6. Let the dough rise at room temperature or at a warm place. If it’s winter where you are, you can use your oven “bread proof” function to let them proof in there, or simply turn on your oven to the lowest temperature and then turn off and after 15 minutes, place the shaped buns in there to let them proof. They won’t necessarily double in size, but at least puff up to about 50% of the original size. This may take about 30 mins to 1 hour at a warm temperature. When you gently push on the dough, it should gradually bounce back. The dough should also feel light and airy. They are done proofing if you have these two signs

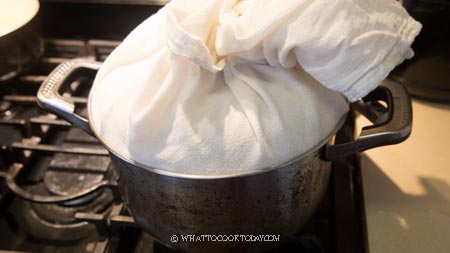
7. Wrap the lid of your steamer with a kitchen towel to prevent moisture dripping back on the steamed buns as this will create “burn” spots . If you use a bamboo basket, you don’t have to do this. The bamboo can “absorb” moisture. Put water inside your steamer. Don’t turn on the heat yet. Arrange the proofed buns in the steamer, give them about 1-inch space for expansion during steaming. Turn the heat on to medium, when the water comes to a simmer, start the time and open the lid about 1/4-1/2 inch to allow some steam to escape. Your steamed buns won’t wrinkle when you steam this way. Steam for 10 minutes over medium heat
8. Put water inside your steamer. Don’t turn on the heat yet. Arrange the proofed buns in the steamer, give them about 1-inch space for expansion during steaming. Turn the heat on to medium, when the water comes to a simmer, start the time and open the lid about 1/4-1/2 inch to allow some steam to escape. Your steamed buns won’t wrinkle when you steam this way. Steam for 10 minutes over medium heat

I used the largest burner on my stove and heat setting is MEDIUM
9. After 10 minutes, turn off the heat. DO NOT OPEN THE LID of the steamer. Let the buns sit there for 1 minute like this. The buns will not sink or wrinkle due to the sudden change in temperature

What to serve with lotus leaf steamed buns
1. Make gua bao/ kong bak bao
2. Serve with char siu (Chinese BBQ pork)
3. Crispy duck or braised duck
4. Beef rendang (oh my god..so good!)
Did you make this lotus leaf steamed buns recipe?
I love it when you guys snap a photo and tag to show me what you’ve made 🙂 Simply tag me @WhatToCookToday #WhatToCookToday on Instagram and I’ll be sure to stop by and take a peek for real!

Check out this Soft and Fluffy No-Yeast Chinese Steamed Buns. These are so good and super easy to make!
Lotus Leaf Steamed Buns (He Ye Bao) / Gua Bao Buns - 3 ways
Ingredients
Option 1:
- 300 g all-purpose flour About 2 cups + 2 1/2 Tbsp (spoon and level), plus more for dusting
- 60 g Wheat starch about 1/2 cup (spoon and level), or use cornstarch or potato starch (not potato flour)
Option 2:
- 180 g all-purpose flour about 1 cup + 5 Tbsp (spoon and level), plus more for dusting
- 180 g cake flour about 1 cup + 5 1/2 Tbsp (spoon and level)
For both options:
- 30 gr sugar 2 Tbsp, you can cut down on the sugar or add more to your taste
- 4 g instant yeast About 1 1/4 tsp
- ¼ tsp salt
- 2 Tbsp cooking oil plus more for brushing
- 200 g milk to start with ( most likely you will need to add more) (about 6 Tbsp) of milk or water (make sure it's cold or room temperature, NOT warm)
Instructions
Making the dough with a machine:
- Place the flour combination (either option 1 or 2), instant yeast, salt, sugar in a mixing bowl. Add the oil and gradually add the milk. Start on the lowest speed and knead until you get a rough dough, adding water as needed. Continue to knead for 10-12 minutes on speed 2 until the dough is smooth and elastic. It may feel slightly sticky to the touch and that's okay. Oil your hands a bit to help you pick up the dough and to prevent the stickyness
Making the dough by hands:
- Place the flour combination (either option 1 or 2), instant yeast, sugar in a mixing bowl. Mix until you get a rough dough (it's not going to be smooth yet). Cover and rest it for 15 minutes. Then go back and knead it. You'll be surprised by how easier it is to knead it now. Knead until the dough is smooth and pliable, about 15-20 minutes. At any point during kneading, you can always stop and rest the dough if you find it hard to knead. This is to relax the gluten. Then go back to knead again and you'll be surprised by the difference it makes by just resting the dough before kneading again. It's easier for you too
Resting the dough:
- Cover and rest the dough for 15 minutes. This is not to proof the dough. It shouldn't double in size. This is to relax the gluten for easier shaping and rolling the dough
- Lightly dust your work surface with a bit of flour. Divide the dough into 12 equal portions
- Keep the dough balls covered to prevent drying out. Work with one dough at a time. Pull and tuck the dough from top to bottom so the seams are at the bottom and the surface is relatively smooth
Shape 1 (fold-over with no design):
- Flatten the dough ball with your palm and use a small roller to roll it out into an oval shape, brush with some oil and then fold the buns over to form a half circle. Put on top of parchment paper square. Put on a baking tray and keep them covered with a lightly damp cloth while you work on the rest
Shape 2 (fold-over with lines design):
- Flatten the dough ball with your palm and use a small roller to roll it out into an oval shape, brush with some oil and then fold the buns over to form a half circle. Put on top of parchment paper square. Use a bench scraper and make several line indentations on the surface (refer to photo). Put on a baking tray and keep them covered with a lightly damp cloth while you work on the rest
Shape 3 (fold-over with lotus leaf design):
- Flatten the dough ball with your palm and use a small roller to roll it out into an oval shape, brush with some oil and then fold the buns over to form a half circle. Put on top of parchment paper square. Use a bench scraper and make several line indentations on the surface (refer to photo) and then use the tines of a fork to gently poke the buns following the line indentations you make earlier. Use a chopstick to gently push the edge of the dough inside to create a curve along the edge of the dough. Gently pinch the straight side of the bun to create the "stem" . Put on a baking tray and keep them covered with a lightly damp cloth while you work on the rest
Proofing:
- Let the dough rise at room temperature or at a warm place. If it's winter where you are, you can use your oven "bread proof" function to let them proof in there, or simply turn on your oven to the lowest temperature and then turn off and after 15 minutes, place the shaped buns in there to let them proof. They won't necessarily double in size, but at least puff up to about 50% of the original size. This may take about 30 mins to 1 hour at a warm temperature. When you gently push on the dough, it should gradually bounce back. The dough should also feel light and airy. They are done proofing if you have these two signs
Steaming:
- Wrap the lid of your steamer with a kitchen towel to prevent moisture dripping back on the steamed buns as this will create "burn" spots . If you use a bamboo basket, you don't have to do this. The bamboo can "absorb" moisture. Put water inside your steamer. Don't turn on the heat yet. Arrange the proofed buns in the steamer, give them about 1-inch space for expansion during steaming. Turn the heat on to medium, when the water comes to a simmer, start the time and open the lid about 1/4-1/2 inch to allow some steam to escape. Your steamed buns won't wrinkle when you steam this way. Steam for 10 minutes over medium heat
- After 10 minutes, turn off the heat. DO NOT OPEN THE LID of the steamer. Let the buns sit there for 1 minute like this. The buns will not sink or wrinkle due to the sudden change in temperature
- Then transfer to a cooling rack immediately to prevent the bottom of the buns from getting soggy due to condensation trapped at the bottom
- Refill steaming water if needed and let it comes back to a simmer over medium heat and continue steaming leaving 1/4-1/2 inch gap to allow steam to escape
Storing:
- If you make extra and plan to store them, place them on a baking sheet, not touching each other, and then put the entire tray inside the freezer for about 1 hour. They will harden, but not completely frozen yet. Transfer to a freezer bag and they will not stick to each other anymore. Try not to keep for more than 1 month
Serving suggestion:
- Make this gua bao / kong bak bao or use them to sandwich other things you like


22 comments
You state to steam for 15 minutes but then started after 5 minutes to turn off the heat and let sit covered for 5 minutes. This does not compute. Is there a typo here?
Hi Stephanie, yes definitely a typo. “steam for 15 minutes .after 15 minutes to turn off the heat and let sit covered for 1 minute” I left the “1” out on the after 15 minutes. I also updated the recipe to say to let the buns sit in the steamer covered for 1 minute (instead of 5 minutes). I recently experimented with this and found that 1 minute is sufficient. Just make sure that during steaming, you leave a gap (in other words, don’t entirely close the lid so some steam can escape). Hope this clarifies.
Hi Marv,
Thank you for the reply. I added more liquids (milk/ oil) and it worked out perfectly. Thank you for sharing your recipe
(had it with braised brisket/shank)
Hi Daniel, I’m glad it worked out for you!! wow…braised brisket/shank!! what a treat to sandwich between the steamed buns 🙂
Hi Marvellina,
Thank you for sharing your recipe. In my attempt, the end product had a really crumbly and floury texture/aftertaste, could you share some advice on why it turned out that way and how can I do better? Thank you.
Hi Daniel, sorry to hear about the trouble. How does your dough feel like ? Usually too much flour and not enough liquid can cause this problem or the dough may not be kneaded enough to have that good structure. Did you knead by hand or machine?
I really liked your recipe but had to make some adjustments:
-Used 1 cup of milk, the mix was really dry with only the 150 mL (2/3cup).
-Had to cook longer than 5 minutes. It was more like 8 minutes with the temperature at medium.
But it was delicious with sticky mushrooms, quick pickled cucumbers and carrots, and beet sprouts!
Hi Phaid, I’m glad you worked it out with some adjustments. I love what you sandwiched between the steamed buns!!! so delish!! Thank you for your feedback
Hello! I am in the process of making these, but I’ve noticed that the link for Shaping into ultra smooth bao buns is missing. (feel free not to include my comment in the comments section😊)
Hi Lisa, so sorry for missing that link. I’ve included that in. Please let me know if anything else is unclear! Would love to hear what you think about it 🙂 HOpe I”m not too late in replying!