This post may contain affiliate links. Please read our disclosure policy.
Soft buttery bread topped with amazing peanut streusel on top is just as good as it sounds. You have to try this Korean peanut streusel bread, often known as soboro bread, to know how good it is. The recipe also includes how to make soboro ppang with a sourdough starter.

One of my favorite moments when we were in New York was our visit to Korean Town. I literally drooled over all the Korean street food and especially the bakery! It’s amazing how innovative and creative all the cakes, bakeries and pastries I’ve seen! I left there feeling so inspired that I told my husband that we had to go to South Korea one of these days!
What is Soboro Ppang/ Soboro bread?
Soboro ppang is a popular Korean soft buttery bun crowned with a crunchy streusel-like topping. The topping is infused with the aromatic peanut butter that will send you insane as it bakes in the oven 🙂 If you have bread with sweet crunchy topping on top such as the Chinese pineapple buns/po lo bao or the Mexican concha pan dulce, you will absolutely love soboro bread!

You can use commercial yeast or sourdough starter
I have been baking a lot with sourdough starter and I thought it would be nice to include that option in this recipe in case anyone is interested.
Sourdough stiff starter/levain for this recipe
Stiff starter usually has 50% hydration or less and it has a consistency like a dough basically! (hence the name!). I do not maintain a stiff starter separately. I use my regular 100% hydration starter to build a stiff starter whenever I need it (that’s the beauty of it!). I love using stiff starter in enriched dough like this. The bread doesn’t taste as sour or not sour at all and stiff starter works much faster and therefore more suitable to be used in enriched dough. Regular 100% hydration starter will take so much longer to ferment because of the added fat, sugar, and other ingredients. I learned about stiff starter from Chiew See from the Autumn’s Kitchen.
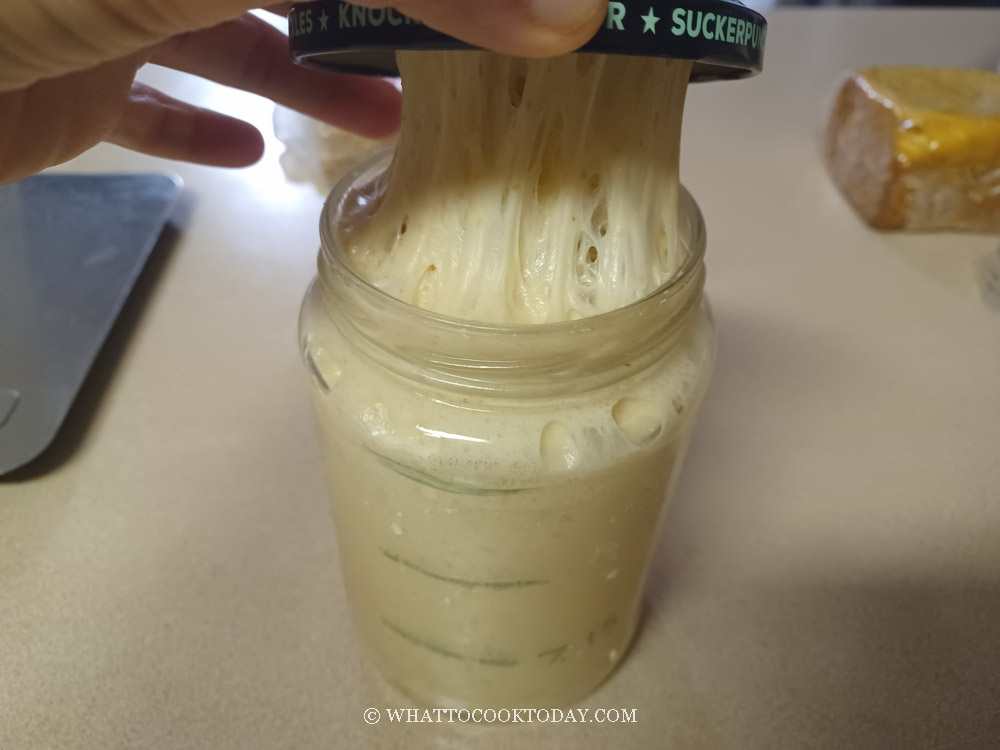
Stiff starter that starts out as a dough-like consistency and now become very “webby” as you can see in the photo below.
How to make soboro ppang at home
1. If using a sourdough starter, about 8-10 hours before you plan to make the bread, combine all ingredients for the stiff starter in a bowl. Stir a bit to roughly combine and then use your clean hand to knead it. This is a stiff starter, it’s like a dough. Make sure no pockets of dry flour is visible. Transfer to a large see-through container (plastic or glass is fine, preferably wide-mouth so you can get it out easier later). Loosely cover with the lid and let it ferment until triple in size
2. Place all ingredients, except for the butter, in a mixing bowl of a stand mixer (including the stiff starter for sourdough version) fitted with a dough hook attachment. Use the hook to stir everything around a bit so when you turn the machine on, the flour won’t fly around and wet ingredients won’t splash (it happened to me before!)
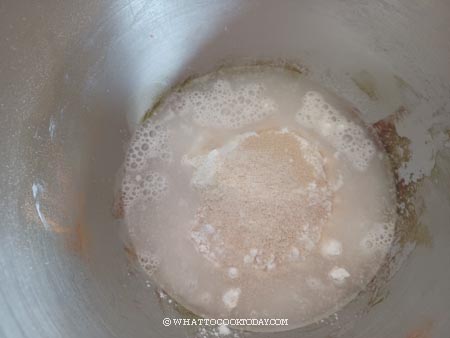
3. Start with the lowest speed to mix things up and then increase to speed 2 and knead for about 5 minutes or until it forms a dough. If the dough too dry to come together, you can add a bit of milk one teaspoon at a time. Don’t add too much as we haven’t added butter yet

4. Then add softened butter, in 3-4 batches. The dough will turn into a complete mess again because of the butter, but don’t worry, it will get absorbed by the dough as it knead

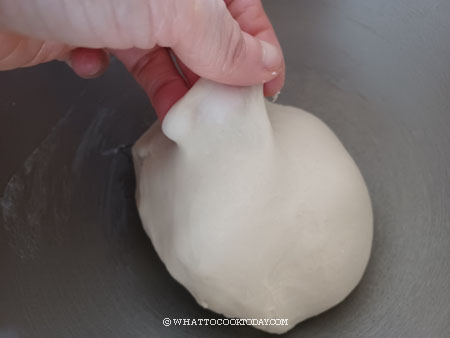
5. Knead at speed 4 for about 10 minutes or until dough is smooth and elastic. If you slowly stretch a small amount of dough, it will not break and light can pass through, like a window pane. Proceed to first proofing
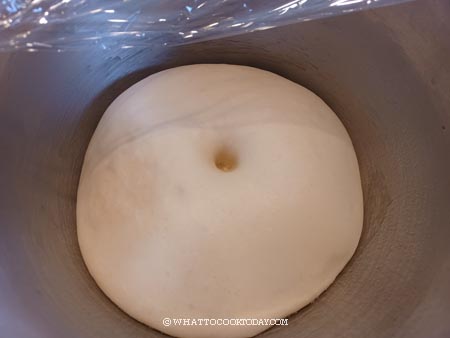
6. Transfer to a lightly oiled bowl, cover, and proof at a warm place until double in size. If you use commercial yeast, this may take about 1-2 hours. If you use sourdough starter, this may take about 2-3 hours at 78-80 F (26-28 C), depending on the strength of your starter and temperature.

7. When you poke the dough with your lightly-floured finger, the indentation stays and the dough has clearly almost doubled or doubled in size
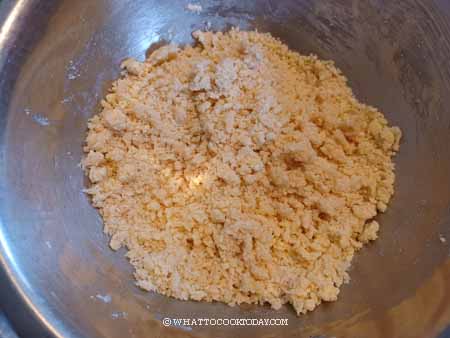
8. When it’s almost end of the first proofing, you can prepare the topping. Combine all the ingredients for the topping in a medium-size bowl. It looks like crumbles
9. Punch the dough down and give it a knead for a few times. Divide into 8-10 equal -size smaller doughs.
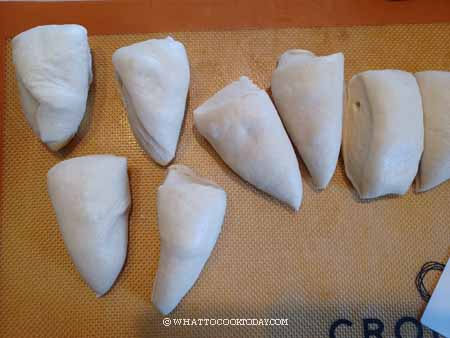
10. Round up each dough to roughly form a ball. Cover and let them rest for 15 minutes
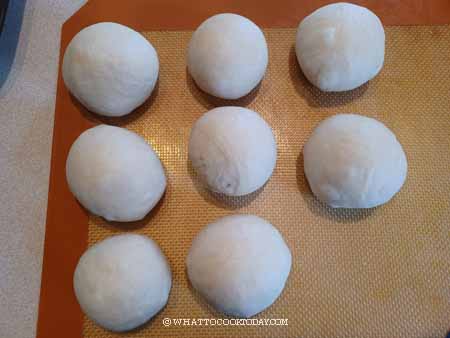
11. Then work with one dough at a time, flatten the dough with your palm and pull the edge towards the center to form a round and tight dough ball. Pick up the dough ball by the seam and dip the surface into the water
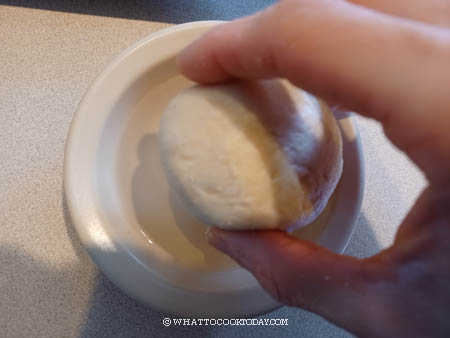
12. Then press the dough ball down on top of the topping to flatten the dough and to make sure the topping really stick to the dough.
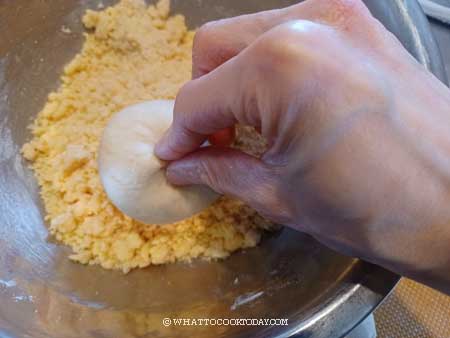
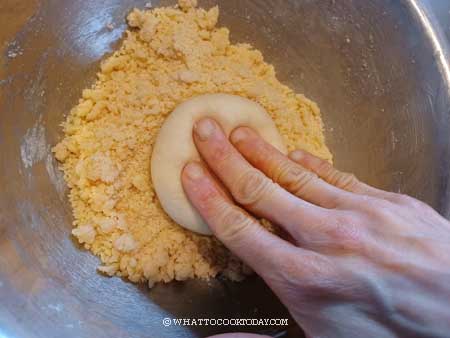
13. Arrange the shaped buns on a large baking sheet lined with parchment paper, about 2 inches apart. Repeat with the rest of the dough ball and topping
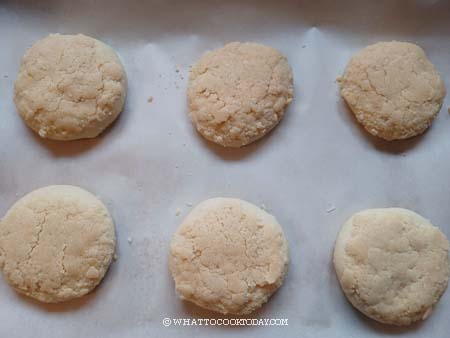
14. Cover the shaped buns with a clean cloth of plastic cover and let them proof again at a warm place until they are puffy and almost double in size. If you use commercial yeast, this may take 45 minutes to 1 hour or longer depending on the temperature. If you use sourdough starter, this may take about 3-4 hours, depending on temperature and the strength of your starter. When you gently push on the dough, the indentation bounces back very gradually and may leave a bit of indentation. The dough also feels really light and puffy. These are signs that we are done with final proofing
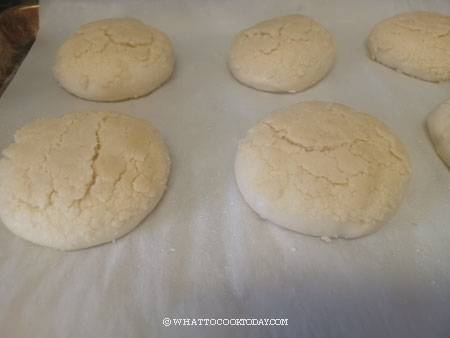
15. 10 minutes before the end of final proofing, preheat oven to 375 F (190 C). Place the baking sheet in the middle rack and bake for 15 minutes or until golden brown. Rotate the pan halfway through baking. Let the buns cool down on the cooling rack before storing

Soboro ppang are best consumed on the same day they are made as the toppings do get soft the next day.But once you reheat it in the oven/toaster oven, or air-fryer, the streusel crisp up again

Did you make soboro ppang recipe?
I love it when you guys snap a photo and tag to show me what you’ve made 🙂 Simply tag me @WhatToCookToday #WhatToCookToday on Instagram and I’ll be sure to stop by and take a peek for real!

Soboro Ppang / Gombo Ppang (Korean Peanut Streusel Bread)
Ingredients
If using commercial yeast:
- 300 gr bread flour
- 4 gr salt
- 6 gr instant yeast
- 40 gr sugar
- 180 gr whole milk
- 50 gr unsalted butter softened
If using sourdough starter:
Prepare stiff levain:
- 30 gr active starter (100% hydration)
- 90 gr bread flour
- 40 gr water
For the dough:
- 210 gr bread flour
- 40 gr sugar
- 4 gr salt
- 165 gr whole milk
- 50 gr unsalted butter softened
Peanut streusel topping:
- 50 gr unsalted butter
- 15 gr peanut butter
- 60 gr sugar
- ¼ tsp salt
- 10 gr egg
- 10 gr honey
- 100 gr all-purpose flour
- 2 gr baking powder
Instructions
For the dough using a commercial yeast:
- Place all ingredients, except for the butter, in a mixing bowl of a stand mixer fitted with a dough hook attachment. Use the hook to stir everything around a bit so when you turn the machine on, the flour won't fly around and wet ingredients won't splash (it happened to me before!). Start with the lowest speed to mix things up and then increase to speed 2 and knead for about 5 minutes or until it forms a dough. If the dough too dry to come together, you can add a bit of milk one teaspoon at a time. Don't add too much as we haven't added butter yet
- Then add softened butter, in 3-4 batches. The dough will turn into a complete mess again because of the butter, but don't worry, it will get absorbed by the dough as it knead. Knead at speed 4 for about 10 minutes or until dough is smooth and elastic. If you slowly stretch a small amount of dough, it will not break and light can pass through, like a window pane. Proceed to first proofing
If using sourdough starter:
- I recommend using a starter that is at least one month old and consistently doubles or triples in 4-6 hours when you feed it at 1:1:1 ratio. Young starter will not give the best result
- I use stiff levain because we are working with enriched dough that has butter and sugar added, which naturally slows down fermentation. Stiff levain is more powerful compared to regular liquid starter. About 8-10 hours before you plan to make the bread, combine all ingredients for the stiff starter in a bowl. Stir a bit to roughly combine and then use your clean hand to knead it. This is a stiff starter, it's like a dough. Make sure no pockets of dry flour is visible. Transfer to a large see-through container (plastic or glass is fine, preferably wide-mouth so you can get it out easier later). Loosely cover with the lid and let it ferment until triple in size
- Place all ingredients (except for butter), including all of the stiff starter, in a mixing bowl of a stand mixer fitted with a dough hook attachment. Use the hook to stir everything around a bit so when you turn the machine on, the flour won't fly around and wet ingredients won't splash (it happened to me before!). Start with the lowest speed to mix things up and then increase to speed 2 and knead for about 5 minutes or until it forms a dough. If the dough too dry to come together, you can add a bit of milk one teaspoon at a time. Don't add too much as we haven't added butter yet
- Then add softened butter, in 3-4 batches. The dough will turn into a complete mess again because of the butter, but don't worry, it will get absorbed by the dough as it knead. Knead at speed 4 for about 10 minutes or until dough is smooth and elastic. If you slowly stretch a small amount of dough, it will not break and light can pass through, like a window pane. Proceed to first proofing
First proofing:
- Transfer to a lightly oiled bowl, cover, and proof at a warm place until double in size. If you use commercial yeast, this may take about 1-2 hours. If you use sourdough starter, this may take about 2-3 hours at 78-80 F (26-28 C), depending on the strength of your starter and temperature. When you poke the dough with your lightly-floured finger, the indentation stays and the dough has clearly almost doubled or doubled in size
Prepare the streusel topping:
- When it's almost end of the first proofing, you can prepare the topping. Combine all the ingredients for the topping in a medium-size bowl. It looks like crumbles.
Shaping:
- Punch the dough down and give it a knead for a few times. Divide into 8-10 equal -size smaller doughs. Round up each dough to roughly form a ball. Cover and let them rest for 15 minutes
- Then work with one dough at a time, flatten the dough with your palm and pull the edge towards the center to form a round and tight dough ball. Pick up the dough ball by the seam and dip the surface into the water and then press the dough ball down on top of the topping to flatten the dough and to make sure the topping really stick to the dough. Arrange the shaped buns on a large baking sheet lined with parchment paper, about 2 inches apart. Repeat with the rest of the dough ball and topping
Final proofing:
- Cover the shaped buns with a clean cloth or plastic cover and let them proof again at a warm place until they are puffy and almost double in size. If you use commercial yeast, this may take 45 minutes to 1 hour or longer depending on the temperature. If you use sourdough starter, this may take about 3 1/2- 4 hours or longer, depending on temperature and the strength of your starter. Final proofing usually takes much longer for sourdough. Mature starter works faster compared to young starter for example
- When you gently push on the dough, the indentation bounces back very gradually and may leave a bit of indentation. The dough also feels really light and puffy. These are signs that we are done with final proofing
Baking:
- 10 minutes before the end of final proofing, preheat oven to 375 F (190 C). Place the baking sheet in the middle rack and bake for 15 minutes or until golden brown. Rotate the pan halfway through baking
Cooling:
- Let the buns cool down on the cooling rack before storing
How to store:
- Once they have cooled down completely, you can put them in an air-tight container and keep them at room temperature for 2-3 days. For longer storage, individually wrap with a plastic wrap and keep them in freezer bag for about 1 month
- The topping gets softer the next day. Simply reheat in the oven at 350 F for 5 minutes or in the air fryer at 320 F for 5 minutes. Let them cool down and the topping becomes crispy again


4 comments
for the stiff levain, can i leave it more than 10 h ? If can, what is the maximum hour ? and does it have to leave at room temperature or in fridge
Hello, ideally you want to use it when it has tripled in volume and it’s at its peak for the best performance, but there had been instances where I couldn’t get to it in time to use it and it was at room temperature for more probably about 15 hours and it was just fine. Now, I haven’t tried leaving it longer than that or parked it in the fridge. I recommend that you use it within the same day and not keeping it in the fridge to be used for the next day.
thank u for answering, will try later the recipe and update later !
Good luck! 🙂