This post may contain affiliate links. Please read our disclosure policy.
In this tutorial, I’m sharing how to make Chinese salted eggs using a 30-day brine solution, 10-day brine solution, and curing the egg yolks directly with salt.
Recipes using salted egg yolks are getting more and more popular in recent years. They are no longer used just for making mooncakes, but you’ll see them in desserts, cakes, and cooking a lot more now. It’s not easy for me to find uncooked duck eggs here, so I have to use chicken eggs instead.
WHICH METHOD TO USE
So, I’m sharing 3 different ways that I have tried to get salted egg yolks. Depending on what you are using them for, here are just my suggestion:
1. Salted eggs 30-day brine method
This method is the “traditional” way of making salted eggs if I can say that. The whole eggs are submerged in a brine solution for 30 days. Sometime it may take a bit longer too. In the end, you will get firm round egg yolks. The salted eggs made with this method is suitable for anything you want to use them for, baking or cooking
2. Salted eggs 10-day brine method
This is the “short-cut” version of the 30-day version. But it’s not like what you think, just soaking the eggs in the brine for 10 days instead of 30 days. We have to soak the eggs in the vinegar prior to soaking them in the brine solution. More explanation on that later down the post. The result is firm round egg yolks. The salted eggs made with this method is also suitable for anything you want to use them for, baking or cooking
3. Salt-cured egg yolks
The egg whites and yolks are separated. You can use the whites for other use (which is great!). We are just using the yolks and curing them directly by covering them with salt. The salted eggs produced with this method will be flat and not round. The salted yolks are not suitable to use in mooncakes or any pastries that you want to show the round shape of the salted yolks. You can use them for grating over pasta, noodles, and in cooking or desserts where you won’t see the shape of the yolks
HOMEMADE SALTED EGGS: BRINING METHOD FOR 30 DAYS
If your purpose of making salted eggs is to make mooncakes, then you will need to follow either the 10-day or 30-day brining method
1. MAKE THE BRINE SOLUTION
Place the salt and water in a large pot and bring to a boil and cook until the salt dissolves. Let it cool down completely.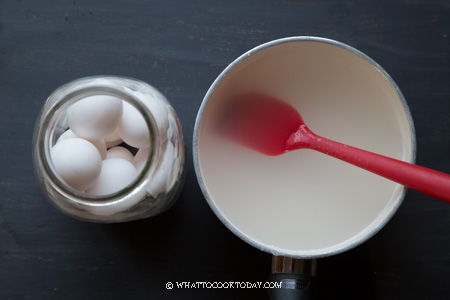
2. BRINE THE EGGS
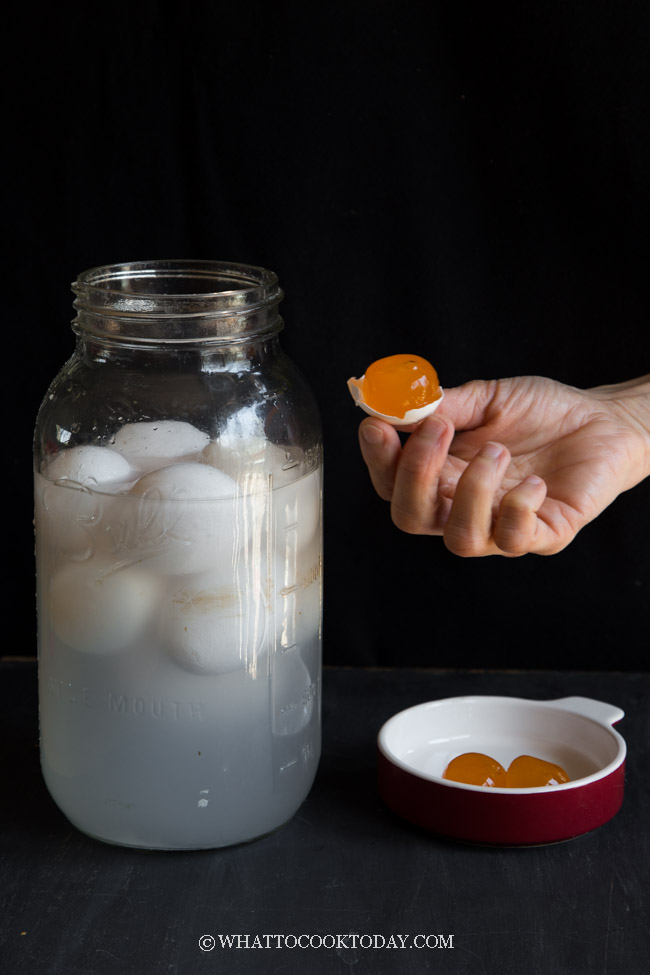
Check each egg to make sure there are no cracks (Cracked one will get rotten inside the brine). Very gingerly place each egg in a glass jar big enough for the amount of eggs you want to brine. When the brine solution has cooled down, gently pour it into the jar. If there are salt crystals, scoop those into the jar too. Add spices if you want ot use. The eggs will float.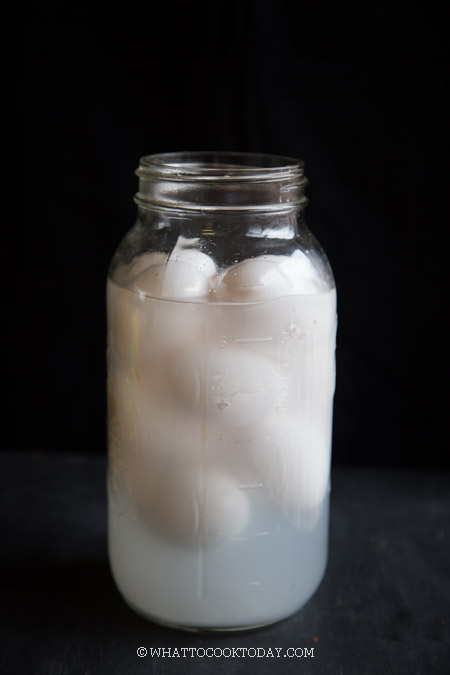
I crumpled up a parchment paper and put it on top to gently push the eggs down so they are all submerged in the brine solution.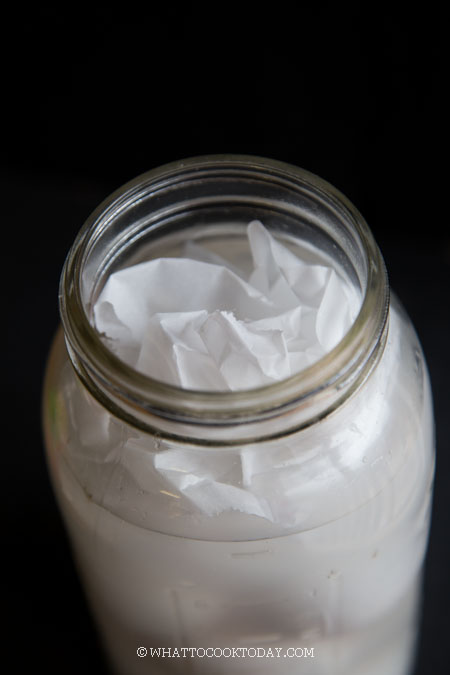
3. BRINE FOR AT LEAST 30 DAYS
Cover the lid and let them sit in the brine for the next 30 days. 30 days usually works well for chicken eggs. For duck eggs, if you can go for 6-8 weeks, they turn out even better and the yolks are “oiler”. Label it on the jar and mark your calendar or set a reminder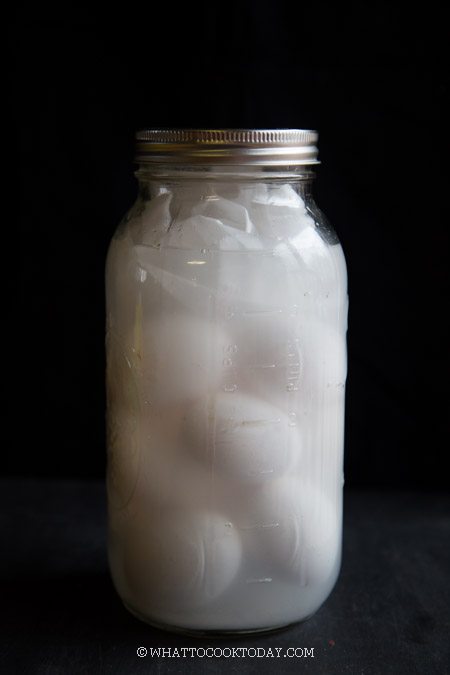
4. AFTER 30 DAYS
At the end of 30 days, take one egg out and you can boil it and give it a try to see if it’s salty enough. Usually the white part is very salty, but the yolk isn’t. If you are happy with the result, carefully drain off some of the brine and take each egg out and place them in the fridge and use them as you need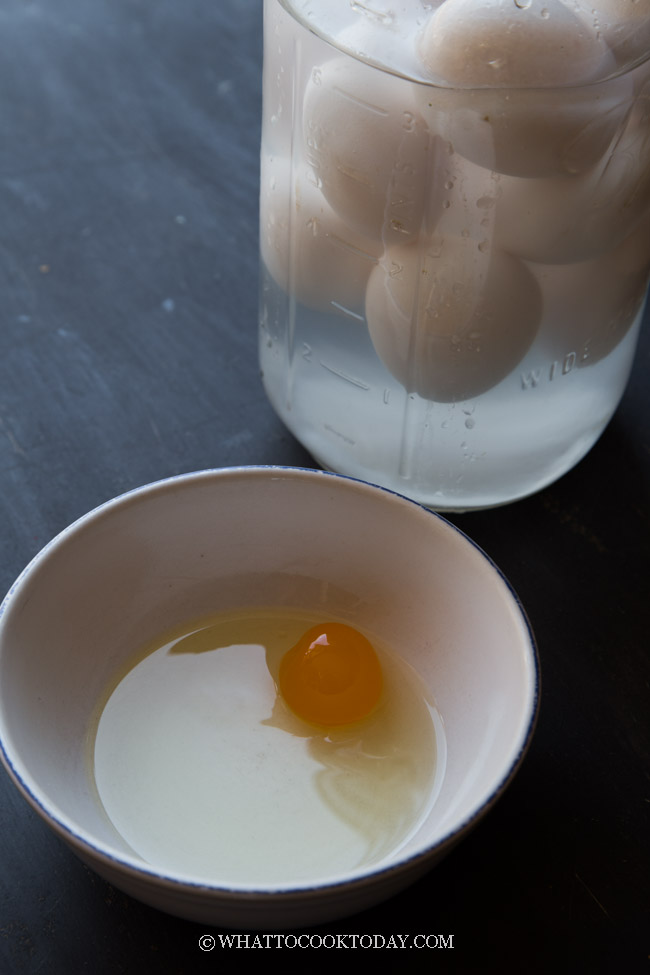
About 30 days of brining, you will surely look forward to that hardened yolk that has deepened in color too.
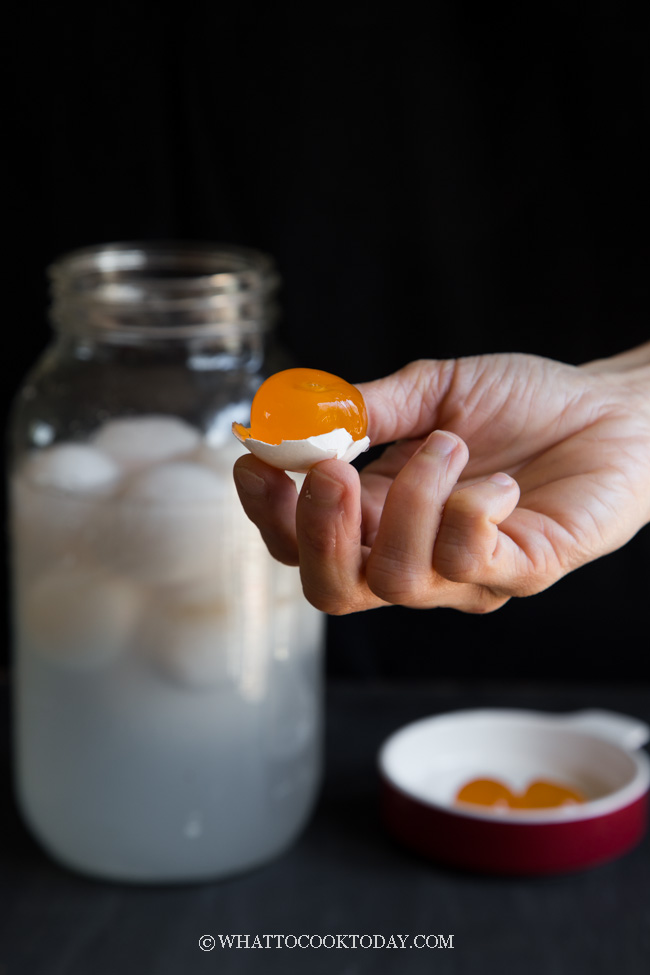
HOMEMADE SALTED EGGS: VINEGAR SOAK AND BRINING METHOD FOR 10 DAYS
The only two differences between this method and the 30-day brining method are the addition of vinegar soak and a shorter period of brining.
1. VINEGAR SOAK
The purpose of soaking the whole eggs in vinegar solution is to “thin” the egg shells, making the brine solution easier to penetrate and curing the eggs since we only have 10 days to do it. The science behind it is that egg shells are mainly made of calcium carbonate, which dissolves in acid (the vinegar) and produces carbon dioxide, which is pretty much just gas. We are not going to completely dissolving the shell, we just want to thin the shell enough to let the brine penetrate faster.
Some whitish or brownish (brown eggs) part may rub off because of the vinegar.
2. MAKE THE BRINE SOLUTION
This step is exactly the same as the 30-day brine method above. So I won’t repeat the step-by-step here.
3. BRINE THE EGGS FOR 10 DAYS
Cover the lid and let them sit in the brine for the next 10 days. Label it on the jar and mark your calendar or set a reminder
4. TEST THE SALTED EGG
At the end of 10 days, take one egg out and you can boil it and give it a try to see if it’s salty enough. The 10-day isn’t as salty as the 30 days, but still salty enough I think, considering it’s only 10 days. Usually the white part is very salty, but the yolk isn’t. If you are happy with the result, carefully drain off some of the brine and take each egg out and place them in the fridge and use them as you need. If it’s not salty enough, cure it for another week or until you are happy with the result
HOMEMADE SALT-CURED EGG YOLKS : QUICK METHOD / DRY METHOD
Another method I had tried, I called the “Quick Method” because it is much quicker and it’s less than 24 hours, also worked out beautifully. The shape of the yolks will not be round. They are going to be more like disc because the egg yolks are actually taken out and cured with salt directly where the brining method uses the whole eggs still intact. These are great for grating over pasta or any dishes you like. They are not suitable for making mooncakes or other pastries. The egg whites can be used for other purposes because they are not cured.
1. SEPARATE YOLKS FROM THE WHITES
Separate the egg yolks from the whites (keep the whites for other use).
Pour about 1-inch of salt in a container
Very gently place the yolks on the salt (as shown in photos). The yolks should be intact. Cover with more salt on top of the egg yolks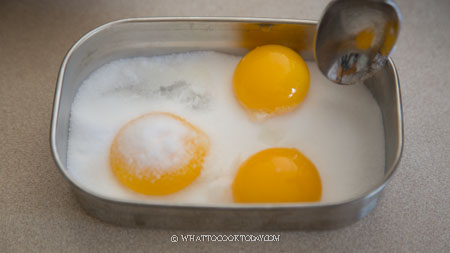
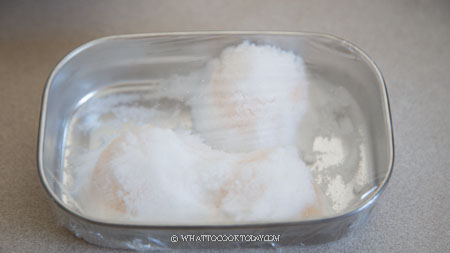
Cover and put them in the fridge and cured for at least 4 hours but no more than 12 hours (depending on how salty and firm you want the yolks to be)
3. BRUSH EXCESS SALT OFF
You can use a brush or just your fingers
4. RINSE THE YOLKS WITH WATER SEVERAL TIMES
After few rounds of testing and some input from readers who have tried this salt-cured method, I found that rinsing with water several times actually helps to get rid of the saltiness. You don’t even need to do apple cider vinegar. Rinse the yolk gently in a bowl of water by gently rubbing with your fingers, and then pour the water off and get a fresh bowl of water and rinse again. Do this for about 3-4 times.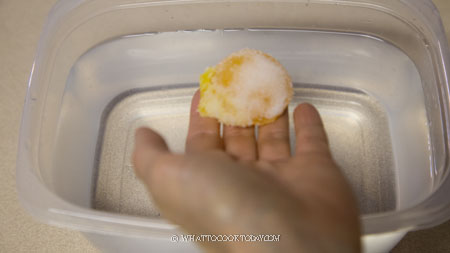
4. DRY FOR ANOTHER 2 DAYS IN THE REFRIGERATOR
Lay these yolks down on the cheesecloth and put them back into the refrigerator without any wrapping to let them dry out for 3-4 days
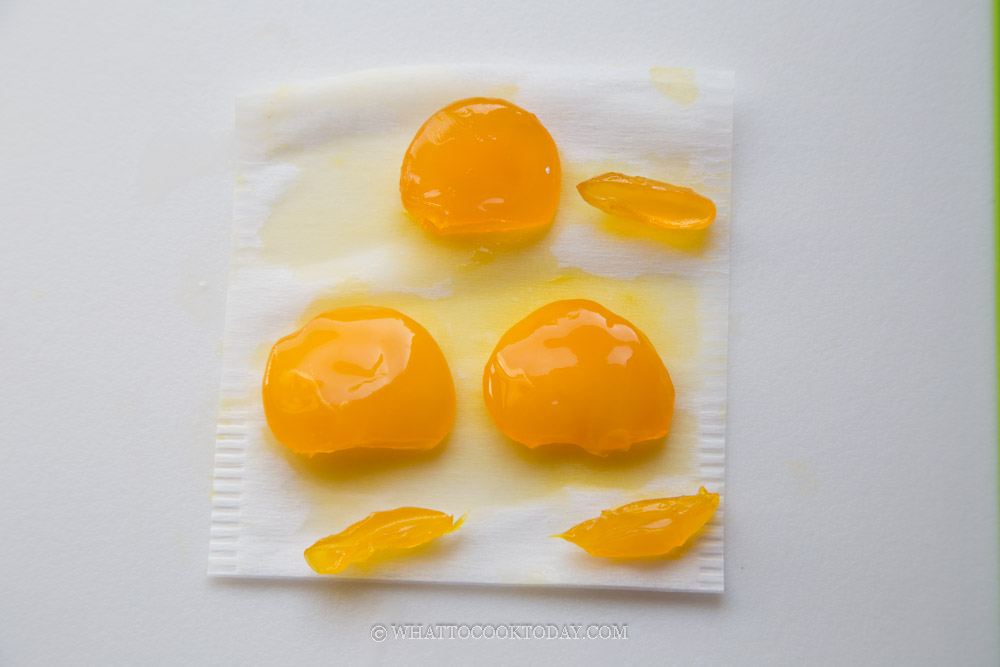
WHAT HAPPENED AFTER CURING FOR 4 HOURS, 8 HOURS, AND 12 HOURS
I tried it for as few as 1 hour and to me that’s definitely not enough to do anything to cure the egg yolk. IMO, you need at least 4 hours or as long as 12 hours. Depending on what you want to use them for, you can go beyond 12 hours too if you want, just know that the longer they are cured in salt directly, the saltier they get and the firmer the texture.
4 hours: The yolk is medium firm, creamy, not too salty
8 hours: The yolk is firm, creamy, and a bit saltier than the 4-hour yolk, but not excessive
12 hours: The yolk is the firmest, but still creamy. It’s the saltiest among the three, but still not excessive IMO
HOW TO SMOKE SALTED EGG YOLKS
1. Put about 1 cup of tea leaves on top of a medium pan and heat them until they started to smoke. Then I lower the heat and place a heat-proof rack/trivet on top of it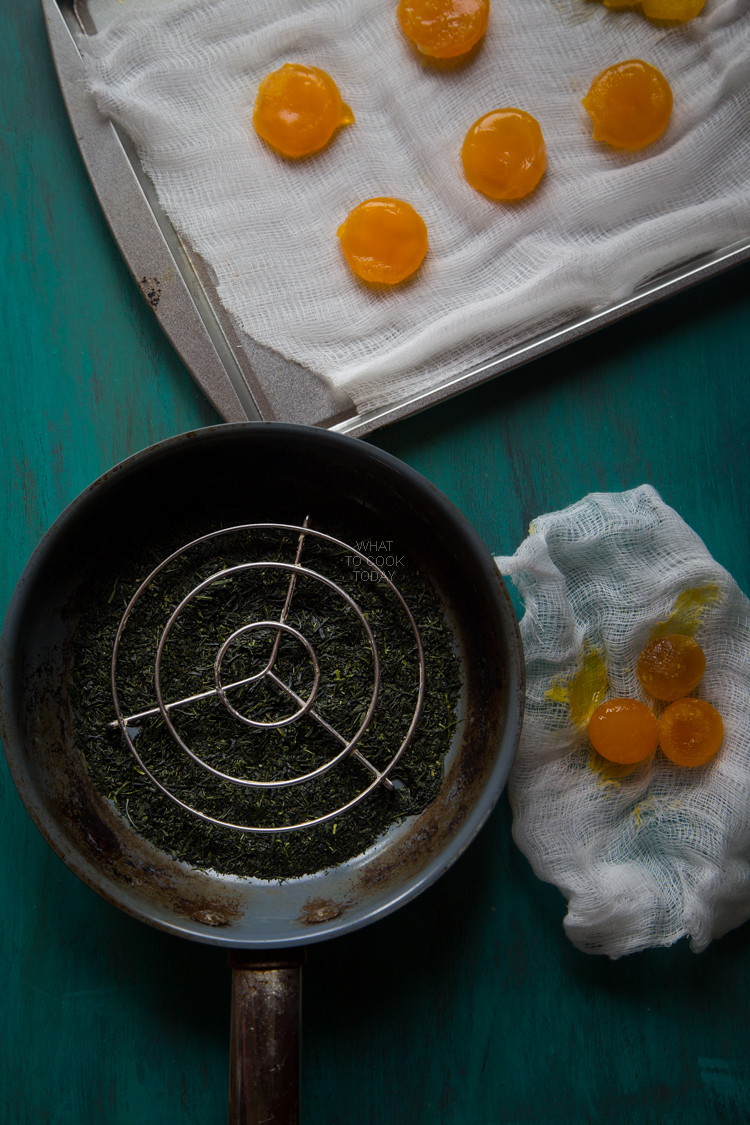
2. Set the egg yolks on top of the rack along with the cheesecloth. Keep them smoking on this low heat for about 30 minutes. The yolks will have that smoky flavor
CAN YOU REUSE THE BRINE SOLUTION AFTER MAKING SALTED EGG YOLKS?
Honestly, I have never tried to do so. The brine solution acts as a preservative and also salts the eggs at the same time, that’s why the eggs ended up being salty. After the first round of brining, we won’t know how much salt is left in the brining solution and whether it is safe enough to be reused. So, I wouldn’t recommend it for those reasons.
WHAT TO DO WITH SALTED EGG WHITES?
Most people tell me they just toss these away, but oh no…such a waste. The whites of the salted eggs usually are very salty. So I usually use them in cooking. Here are few ideas:
1. Scrambled eggs
I usually mix some of this salted egg whites with regular eggs to make scrambled eggs and that way I don’t need to add salt anymore and it’s the perfect amount of savory in the scrambled eggs. I use about 1 salted egg whites for 4 regular eggs, but the amount may vary depending on how salty the salted egg white is
2. As a topping on salad or crackers
You can cook the egg whites in the pan or steam them and then chop into tiny pieces and sprinkle on salad or on crackers, just like how you would eat cheese. They are salty, so you only need small amount
3. Make salted egg white fried rice
I’ve done this several times and it’s such a great combination. I scramble the egg whites first and break into tiny pieces (you don’t want to bite into salty big chunks) and then stir fry with the rice
RECIPES THAT USE SALTED EGGS
Sweet and Savory Salted Egg Yolk Chiffon Cake
Salted Egg Yolk Seafood Pasta with Black Truffles
Ube Bibingka Galapong
Golden Crispy Salted Egg Yolk Chicken
Hokkien Bak Chang
Salted Egg Yolk Cookies
Pandan Liu Sha Bao (Salted Egg Yolks Custard Pandan Steamed Buns)
Stir-fried Zucchini with Salted Egg Yolks
Homemade Salted Duck or Chicken Eggs (Brine Solution or Salt-Cured)
Ingredients
For the brine: For both 30-day or 10-day
- 300 g kosher salt or coarse salt. See notes 1
- 1200 g water
- 12 duck/chicken whole eggs
Optional spices:
- 2 star anise
- 2 Tbsp black peppercorns
- 1 cinnamon stick
Vinegar solution (for 10-day brining method):
- 300 g white vinegar
- 600 g water
Quick Salt-cured Method:
- 6 duck/chicken egg yolks
- Table salt or any fine-grain salt
- Cheesecloth or coffee filter
- Water to rinse off salt
For smoking the salted egg yolks:
- Wood chips or tea leaves I used tea leaves
Instructions
Prepare the brine:
- Place the salt and water in a large pot and bring to a boil and cook until the salt dissolves. Let it cool down completely. Some salt crystals may form after cooling, not a problem
To brine for 30 days:
- Wash the eggs with clean water and then pat them dry with an absorbent paper towel
- Check each egg to make sure there's no cracks (Cracked one will get rotten inside the brine). Very gingerly place each egg in a glass jar big enough to harbor 10-12 eggs. When the brine solution has cooled down, gently pour it into the jar. If there are salt crystals, scoop those into the jar too. Add the spices if you plan to use. The eggs will float. I crumpled up a parchment paper and put it on top to gently push the eggs down so they are all submerged in the brine solution. Place this jar at a cool place, away from sunlight, at room-temperature.
- Update: for chicken egg, 30 days are usually sufficient to brine the eggs. If you use duck eggs and you want the yolk to be "oiler", brine it for 6-8 weeks if you have the time, otherwise, 30 days are okay too for duck eggs
- At the end of 30 days, take one egg out and you can boil it and give it a try to see if it's salty enough. Usually the white part is very salty, but the yolk isn't. The yolk will harden and can be held with your fingers. If you are happy with the result, carefully drain off some of the brine and take each egg out and place them in the fridge and use them as you need. I would say keep them for max 2 weeks in the fridge. If you want to keep them longer, you need to boil them.
To brine for 10 days:
- You need to prepare a vinegar solution to soak the eggs first before you can brine them
- Mix the vinegar and water in a large bowl, enough for 10-12 eggs. Soak the eggs in there, make sure they are completely submerged. If not enough, you can make more of the vinegar and water solution. The ratio we are using here is 2 parts water and 1 part vinegar
- Soak the eggs in vinegar solution for 3-4 hours. There will be lots of bubbles inside the jar. After that, remove from the vinegar solution and rinse them with water and carefully pat each egg dry with clean towel
- Very gingerly place each egg in a glass jar big enough to harbor 10-12 eggs. When the brine solution has cooled down, gently pour it into the jar. The eggs will float. I crumpled up a parchment paper and put it on top to gently push the eggs down so they are all submerged in the brine solution. Let them sit in the brine for the next 10 days. Label it on the jar and mark your calendar or set a reminder. Place this jar at a cool place, away from sunlight, at room-temperature.
- At the end of 10 days, take one egg out and you can boil it and give it a try to see if it's salty enough. Usually the white part is very salty, but the yolk isn't. The yolk will harden and can be held with your fingers. If it's not salty enough for your tastse, you can brine for another week and see. If you are happy with the result, carefully drain off some of the brine and take each egg out and place them in the fridge and use them as you need. I would say keep them for max 2 weeks (no longer than that). If you want to keep them longer, you need to boil them.
To boil the salted eggs:
- If you want to boil the salted eggs after brining, place them in a pot and cover with water. Bring to a boil over medium heat and start the timer once the water starts to boil and cook for 9-10 minutes. Then remove from the boiling water and submerge in cold running water to stop the cooking process. Let them cool down completely and then store in the fridge for up to one month
For making mooncakes:
- If you plan to use the salted yolks for mooncake from brining method (either 30-day or 10-day method), you can spray the salted egg yolks with 1 Tbsp of rose cooking wine (or any cooking wine) to remove unpleasant smell from salted egg yolks. Bake in a preheated oven at 350 F (180 C) for 10 minutes and let them cool off completely before using
Quick Method (not suitable for mooncakes):
- In a clean small baking sheet or platter (or anything you wish to use), place about 1-inch layer of salt. Separate the egg yolk from the white (keep the whites for other use) and very gently place the yolks on the salt (as shown in photos). The yolks should be intact (I have one that was "broken" and I tried to cure it anyway to see how it went, the result was still good, just not as pretty). Cover with more salt on top of the egg yolks. Wrap with a plastic wrap and place this inside the refrigerator and let them cured for at least 4 hours to no more than 12 hours. The longer you cured them, the firmer the texture and saltier they will be
- Gently dust off most of the salt with your clean hands or use a clean brush. You can see that the yolks have somewhat hardened at this point with some creaminess on the outside. Gently submerge each yolk in a clean bowl of water and gently rub with your fingers. Dump the water out and refill with fresh water and do this again for another 3 more rounds to get rid of excess salt
Drying the cured yolks :
- If you want to grate it like a block of cheese as topping on your pasta, etc, place a clean cheesecloth on a tray. Lay these yolks down on the cheesecloth and put them back into the refrigerator without any wrapping to let them dry out for 3-4 days
- You can also dry them in a dehydrator or in your oven. Set the temperature to 300 F (150 C). Place the salted egg yolks on a rack/cooling rack if using oven (sprayed with non-stick spray) for about 3 hours.
Smoking the salted egg yolks:
- I use tea leaves to smoke the egg yolks. You are welcome to use wood chips to do that.
- I place about 1 cup of tea leaves on top of a medium pan and heat them until they started to smoke. Then I lower the heat and place a heat-proof rack on top of it and set the egg yolks on top of the rack along with the cheesecloth. Keep them smoking on this low heat for about 30 minutes. The yolks will have that smoky flavor
- Remove and store in an air-tight container. Some said these can be stored at room temperature. But I’m a little nervous about storing them at room temperature. I stored them in the refrigerator. Should be good for about a month
How to store (for both methods):
- The cured yolks (not-dried) can be kept in the fridge in a clean container for about 2 weeks. If you dried them, you can keep them in an air-tight container for about 1 month or could be longer
Marv’s Recipe Notes
- You can use table salt too. If you use table salt, reduce the amount to 225g(3/4 cup). Both kosher salt and table salt have an anti-caking agent and table salt collects at the bottom of the jar and makes the brine cloudy but won’t affect the result.

64 comments
How do you store the egg yolk (from the quick method) and how long can you store it for?
Once you dried them in the fridge, you can keep them in an air-tight container in the fridge. You can keep them for about one month or so, or might be longer.
Hi Marv,
Just to let you know that my tried your quick method for the duck egg and have to agree with Ivy that it turned out very very salty. I even tried to rinse it with water but it was so salty. I then proceeded to follow your recipe for Liu Sha Bao using the egg yolk as I thought the sweetness may balance out the saltiness. Unfortunately not, they just came out of the steamer and I tasted one. The filling from the boa is so salty that I feel like it is just a salt filling. Sorry to say, neither of your recipe worked for me this time. I may try the brine method and see if this will come out any better.
Maybe for quick method 3 days in salt is too long? Not sure.
Hi Tiffany, Sorry that they didn’t work for you. I’ll take a look into this again! Appreciate your feedback a lot!!
For the quick method, do you need to cook the egg yolks before using in recipes? If so, can you describe how to cook them? Thanks
Hi Ivy, for the quick method, you don’t need to cook the egg yolks and it can be used in recipe. The salt has “cooked” the yolks. I hope this helps!
Thanks Marvellina. Unfortunately the quick method produced egg yolks that are far too salty. Such a shame, I was so excited about fast-tracked salted egg yolks!
Hi Ivy, did you wash the extra salt off with vinegar?
Hi Marvellina, yes I did. Just watched your video and it looks like I used LESS salt than you did to cure the yolks. Though I don’t see how that would make them saltier!!
Hi Ivy, you may want to brush off more of the salt, sometimes the yolks can still be a bit tacky. You can use a damp paper towel to remove those excess salt. It shouldn’t be awfully salty if that’s what you are wondering.
And one thing ..does it matter if I store the eggs in plastic container instead of glass bottles?? Thanks a lot!
Hi Babes, it shouldn’t affect the result.
2 questions: Can you wash the eggs before adding to the jar? And Can you do this is the eggs have been refrigerated for a few days? Thanks!
Hi Aj, you can wash the eggs if you prefer, I didn’t. I usually keep my eggs in the fridge too, but you don’t need to with the brine method as the salt will “perserve” and slowly “cook” the eggs.
Do you know how long I can store the salted yolks in fridge after 3 days of curing?
It can be kept for about 2 weeks in the fridge.