This post may contain affiliate links. Please read our disclosure policy.
Learn how to easily make tempeh at home using soybeans or other types of beans at home. You can use an oven or instant pot to culture the tempeh.
Making my own tempeh is another one of the projects that have been on my list for a few years now and finally, I’ve gotten a chance to do it. Tempeh is considered a “street food” in Indonesia. It’s sold at the market and considered a very cheap source of protein and they are highly nutritious. Some even said tempeh are “poor people” food. Nowadays though, with the vegan population continue to rise, tempeh has become one of the important protein sources worldwide. Tempeh is definitely not a “poor people” food here in the U.S. 🙂 They aren’t cheap and that’s why I decided to make my own tempeh using a tempeh starter.
MAKING TEMPEH ISN’T AS HARD AS YOU THINK
The thought of making my own tempeh maybe a bit overwhelming at first. There is really no fancy equipment needed. They only need a warm environment to culture, which is how the weather is like in Indonesia. It may be a bit tough in winter time, but I use my kitchen oven or now I have Instant Pot, to let them incubate and culture. They are really easy to grow. But after making it once, there’s no stopping me 🙂 It’s very rewarding and not to mention homemade tempeh tastes the best for real!
WHERE TO BUY TEMPEH STARTER
I got my tempeh starter (Rhizopus mold) from Amazon and I use this (affiliate link) or you can get it directly from Cultures for Health (not sponsored). I’ve been using their tempeh starter for years without any problems. They have regular soy tempeh starter and non-soy tempeh starter
YOU CAN USE DIFFERENT BEANS TO MAKE TEMPEH
I’ve used the same tempeh starter to make black beans and chickpeas tempeh. You can use any kind of beans you like such as mung beans, red beans, etc.
TO DEHULL OR NOT DEHULL THE SOYBEANS
I’ve tried making tempeh the “easy” way without having to dehull the soybeans. While they turned out okay, but the beans are not as “tightly” woven together by the spores compared to if I dehull the beans. So they fell apart when I used them to stir fry or pan-frying. Maybe I’ve missed something. But so far, I still recommend dehulling the soybeans.
YOU DON’T NEED A SPECIAL EQUIPMENT
There is an instruction that comes with the tempeh starter that I purchased, but I modified the instruction a little bit. I don’t have any special equipment, such as an incubator to culture the tempeh. I only have an oven to culture the tempeh. Now I have an Instant Pot too, I love the fact that I can use that to cook the soybeans in just 15 minutes and I can use it as an incubator to culture the tempeh
HOW TO DEHULL SOYBEANS
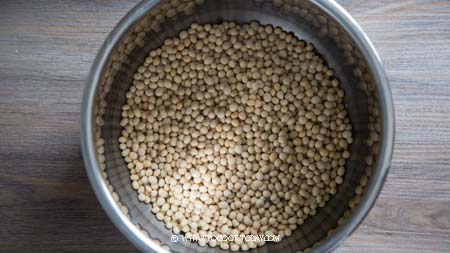
1. SOAK THE SOYBEANS
Place 2 cups of soybeans in a large pot. Pour cold water to cover the beans. Let it sit for at least 10 hours or up to 24 hours
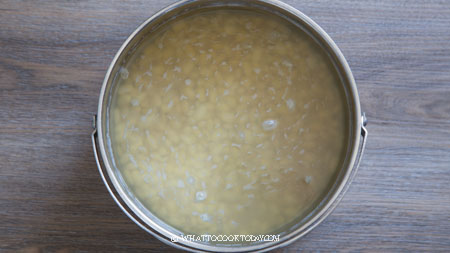
2. RUB THE BEANS TO REMOVE THE HULLS
Drain off the water and fill with more fresh water and use your two hands to rub the soybeans as if you are washing your hands.
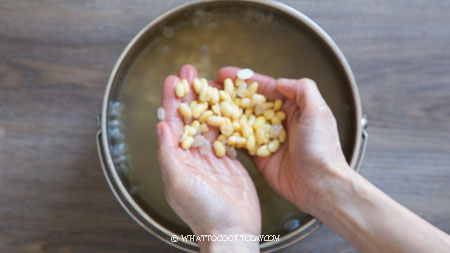
This will rub off the skin off the soybeans. The skin will rise to the top of the water and scoop those skins away and pour off the water and fill up with fresh water and rub again. Do this for about 3-4 times, or until you take off most of the skin. You may not be able to take off all the skin, but take off as much as you can

HOW TO MAKE YOUR OWN TEMPEH AT HOME
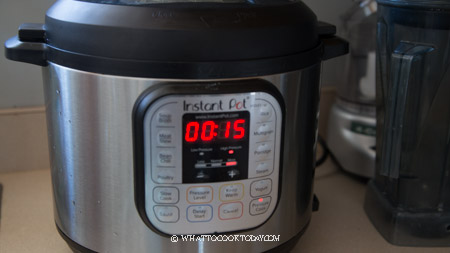
1. COOK THE DEHULLED SOYBEANS
If using Instant Pot: Place the dehulled beans in the inner pot of Instant Pot. Fill up with 6 cups of water

Close the lid and turn the steam release valve to “sealing”. Press “pressure cooker” and make sure it’s on “high pressure”. Set timer to 15 minutes and then wait 5 minutes before fully releasing the pressure
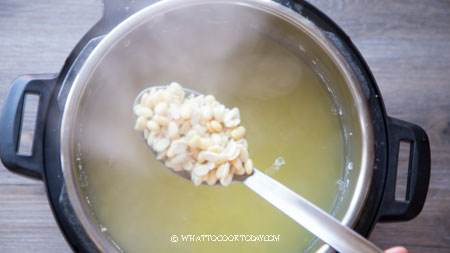
Remove some of the hulls that you may see floating to the top. Drain off the water

The soybeans should be soft and cooked through, but not mushy. Proceed to “dry the beans” step below
If cooking the soybeans on the stove: Place the dehulled beans back to the pot and fill up with 8 cups of water, bring to a boil and then lower the heat and cover the pot and cook for 1 hour. Just check on the water to make sure it doesn’t run out while you are boiling it. Drain off the cooking water after the beans are soft and cooked through. Proceed to “dry the beans” step below
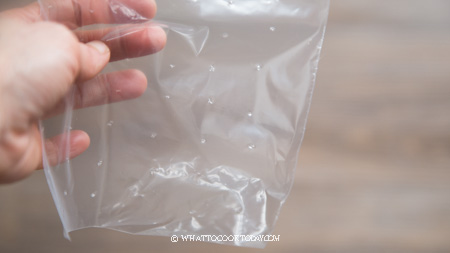
3. PREPARE BAGS
You can use either 1 quart or 1/2-quart resealable plastic bag. Use a toothpick to poke a hole through, about 1-inch apart
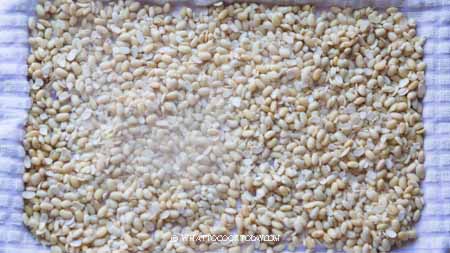
2. DRY THE BEANS
Spread the cooked beans on the cloth
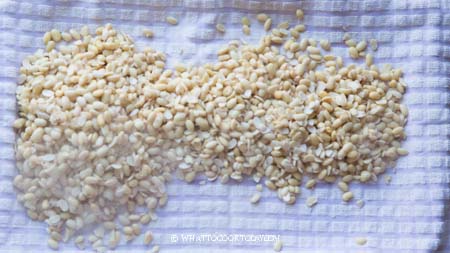
Use another dry towel to gently rub the beans to dry them

The beans have to be dry to touch. You can also use a blow dryer on low heat to dry the beans
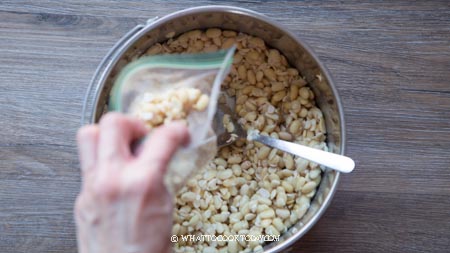
3. MIX BEANS WITH VINEGAR AND TEMPEH STARTER
Verify the temperature of the soybeans by using a thermometer. Gently poke it into the beans. The temperature should be around 90-95 F. Pour in 2 Tbsp of distilled white vinegar and sprinkle 1 packet (about 1 tsp) of the tempeh starter. Use a clean spatula to mix it around to make sure the beans are covered with the starter and vinegar

4. FILL THE BAGS
Fill the bags with the beans, making sure you fill it to the corner but do not overpack it. It should be about 1 to 1 1/2-inches in thickness. Push all air out and seal the bags

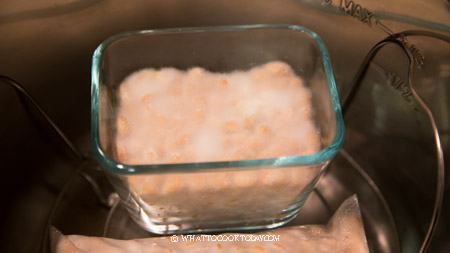
5. INCUBATE
If you use Instant Pot to incubate: Put a trivet in the inner pot of Instant Pot. Gently put the bags on top of the trivet. Close the lid and press “Yogurt” button repeatedly until the light shows “less” mode and then set the timer to 14-24 hours. I set to 14 hours first to remind me to check on the beans and wipe off any condensation inside the lid & then continue to culture until about 48 hours

If you use oven to incubate:
Place the bags of beans on a clean baking sheet and place them inside the oven

Place a thermometer inside the oven so you know the temperature. It should be around 90-95 F


6. MONITOR THE GROWTH
I only start seeing a bit of growth starting at about 24-hour mark in my case when I use an oven as an incubator

The ones in Instant Pot starting to show some growth at around 20 hours
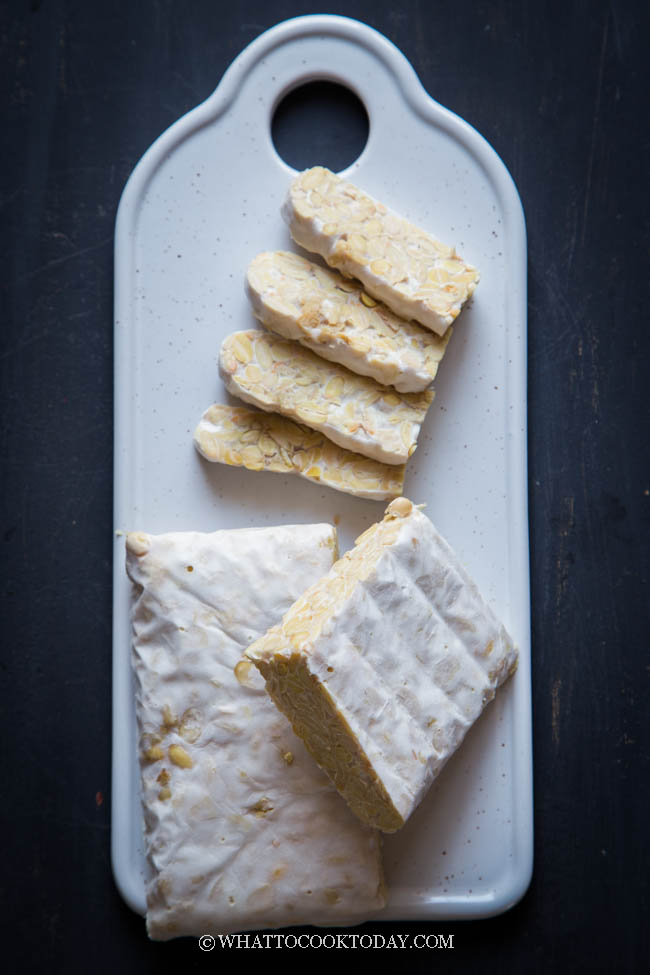
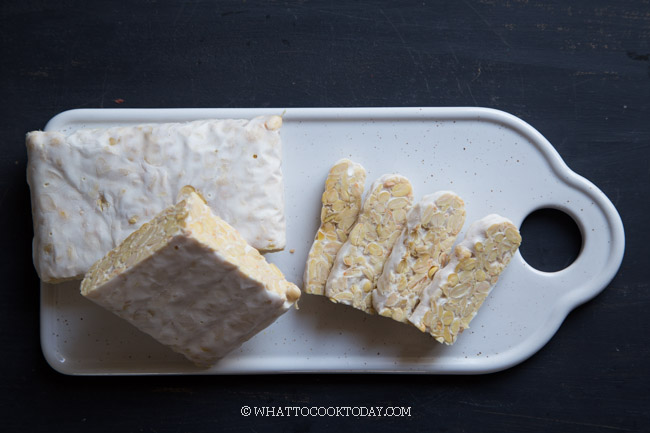
Both do grow rapidly after 24 hours and the tempeh generates its own heat and you will notice a rise in temperature. Make sure it is maintained between 90-95 F. This is how they look like close to 48 hours
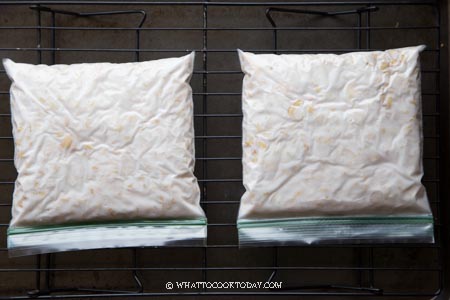
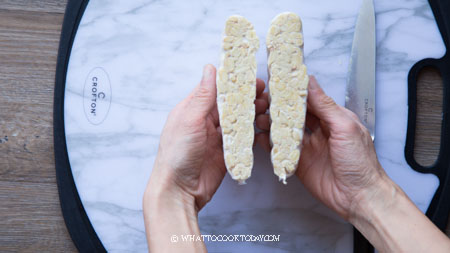
The tempeh is done culturing when they are covered with white spores all over and you can pick it up like a block without it breaking apart. It should be firm.

FREQUENTLY ASKED QUESTIONS ABOUT TEMPEH
HOW LONG TO CULTURE TEMPEH
The whole process may take up to 48 hours or a bit longer sometimes for fully cultured tempeh
BLACK SPOTS ON TEMPEH
If you see some black spots, DO NOT PANIC. It doesn’t mean that your tempeh is bad. In fact, those are actually the spores that also an indication that the fermentation of your tempeh is complete. The tempeh has matured. The tempeh will have a pleasant nutty fermented aroma. Many people in Indonesia like a black tempeh as a matter of fact. It has stronger aroma.
HOW TO KNOW IF TEMPEH HAS GONE BAD
Here are a few signs:
1. The tempeh is slimy and slippery to touch
2. It has very strong pungent ammonia-like smell
3. It doesn’t have a pleasant aroma at all
CAN I EAT RAW TEMPEH?
Even though the soybeans are cooked prior to making tempeh, during the fermentation process, these soybeans feed the tempeh starter and by the end of fermentation, what left are other nutrients and amino acids in the tempeh. So, to make a long story short, it is considered a “raw” food and it’s better not to eat raw tempeh
HOW TO STORE TEMPEH
Wrap them with a plastic wrap. Freeze them if you are not going to cook them anytime soon. It’s good up to 6 months in the freezer and about 10 days in the refrigerator

How To Easily Make Tempeh at Home
RECIPE IDEAS USING TEMPEH
Kering Tempeh Kacang (Spicy and Sweet Fried Tempeh and Peanuts)
Sambal Goreng Tempeh (Fried Tempeh in Spicy Sambal)
Tempeh Mendoan / Crispy Thin Fried Spiced Tempeh
Tahu dan Tempe Bacem (Braised Spiced Tofu and Tempeh)
Tempeh Fritters (Perkedel Tempeh)
Gulai Tempeh (Tempeh Stew)

DID YOU MAKE TEMPEH AT HOME?
I love it when you guys snap a photo and tag to show me what you’ve made 🙂 Simply tag me @WhatToCookToday #WhatToCookToday on Instagram and I’ll be sure to stop by and take a peek for real!
How To Easily Make Tempeh at Home
Ingredients
- 400 gr dry soybeans or other beans of your choice about 2 cups, organic non-GMO if possible
- 1 tsp tempeh starter (rhizopus oryzae or rhizopus oligosporus culture)
- 2 Tbsp distilled vinegar
Equipments:
- hairdryer or 2-3 large tea or kitchen towel
- Thermometer
- Instant Pot or your kitchen oven
- 2 1-quart zipper bags or 4 1/2-quart zipper bags see notes
Instructions
SOAKING:
- I got my tempeh starter from Cultures of Health and one packet is good for 2 cups of soy beans and so that's the amount I used.
- Place 2 cups of soy beans in a large pot. Pour cold water to cover the beans. Let it sit for at least 10 hours or up to 24 hours
DEHULLING:
- Drain off the water and fill with more fresh water and use your two hands to rub the soybeans as if you are washing your hands. This will rub off the skin off the soy beans. The skin will rise to the top of the water and scoop those skins away and pour off the water and fill up with fresh water and rub again. Do this for about 3-4 times, or until you take off most of the skin. You may not be able to take off all the skin, but take off as much as you can, but there's no need to be obsessed about it
IF COOKING SOYBEANS ON THE STOVE:
- Place the dehulled beans back to the pot and fill up with 8 cups of water, bring to a boil and then lower the heat and cover the pot and cook for 1 hour. Just check on the water to make sure it doesn't run out while you are boiling it. Drain off the cooking water after the beans are soft and cooked through. Proceed to "dry the beans" step below
IF COOKING SOYBEANS WITH PRESSURE COOKER:
- Place the dehulled beans in the inner pot of Instant Pot. Fill up with 6 cups of water. Close the lid and turn the steam release valve to "sealing". Press "pressure cooker" and make sure it's on "high pressure". Set timer to 15 minutes and then wait 5 minutes before fully releasing the pressure
- Drain off the water. The soybeans should be soft and cooked through, but not mushy. Proceed to "dry the beans" step below
PREPARE BAGS AND CONTAINER TO CULTURE THE BEANS:
- While the beans are cooking, you can prepare two 1 quart-size zip lock bags or four 1/2 quart-size zip lock bags that are already poked with a toothpick on both sides (1-inch apart)
DRY THE BEANS:
- Spread two to three dry clean absorbent cloth on the kitchen counter or wherever with enough space. Spread the cooked beans on the cloth and use another dry towel to gently rub the beans to dry it. The beans need to be dry to touch. You can also use a hair dryer on low heat to blow dry it. The temperature of the beans should be about 90-95 degrees.
MIX BEANS, STARTER, AND VINEGAR & FILL THE BAGS:
- Place the dried soybeans but still slightly warmed beans in a large bowl. Pour in 2 Tbsp of distilled white vinegar and sprinkle 1 packet (about 1 tsp) of the tempeh starter. Use a clean spatula to mix it around to make sure the beans are covered with the starter and vinegar
- Fill the bags with the beans, making sure you fill it to the corner but do not overpack it. It should be about 1 to 1 1/2-inches in thickness. Push all air out and seal the bags
IF YOU INCUBATE THE BEANS IN INSTANT POT :
- Put a trivet in the inner pot of Instant Pot. Gently put the bags on top of the trivet. Close the lid and press "Yogurt" button repeatedly until the light shows "less" mode and then set the timer to 14 hours. I set to 14 hours first to remind me to check on the beans and wipe off any condensation inside the lid & then continue to culture until about 48 hours using yogurt function
IF YOU INCUBATE THE BEANS IN THE OVEN:
- If your oven has a "bread proof" function, turn it on. This helps to maintain the temperature at 90-95 F. If your oven doesn't have this function, turn the oven's light on. This helps to maintain that temperature too. Place the bags of beans on a clean baking sheet and place them inside the oven. Place a thermometer inside the oven so you know the temperature
MONITOR THE GROWTH:
- I only start seeing a bit of growth starting at about 24-hour mark in my case when I use an oven as an incubator. The ones in Instant Pot starting to show some growth at around 20 hours. They started to grow rapidly after 24 hours. You will notice that the tempeh culture actually generates its own heat. This process may take up to 48 hours or it may not
- The tempeh is done when it covers with white spores all over and you can pick it up like a block without it breaking apart. It should be firm
- When you open the lid of Instant Pot to monitor the growth, use a clean paper towel to wipe off the condensation that accumulates on the lid before closing it back again, this way the water droplets won't drop on the tempeh
- If you see some black spots, DO NOT PANIC. It doesn't mean that your tempeh is bad. The tempeh should has nutty pleasant fermented aroma. If it smells foul, then the tempeh is most likely no good and you should discard it
- The whole process may take up to 48 hours or a bit longer sometimes for fully cultured tempeh
HOW TO STORE TEMPEH:
- Wrap them with a plastic wrap. Freeze them if you are not going to cook them anytime soon. It's good up to 6 months in the freezer and about 10 days in the refrigerator


14 comments
I tried to make tempeh in instant pot. I incubated for 48 hours. The outside is white and firm, however in the middle third is crumbly (barely any white growth). I tried to incubate longer for additional 10-12 hrs or put extra starter (I used reprimand starter). I have no luck, same result. I follow the direction. What do I do wrong? Do you have any suggestion?
Hi Anita, hmm…it’s hard for me to pinpoint what the problem could be. Did you pack the beans tight into the bag or container?
Hi Marv- we left it in the oven with the lights on and we kept it there for 48 hours at least. We didn’t see any growth at all. It seems like the light might not produce enough heat.
I have ninja foodi that has dehydrator however the lowest heat setting was at 105F instead of 95F. So it was also not successful. I was thinking of buying a dehydrator just for making tempeh but we have a lot of appliances already so i am very hesitant. It’s such a bummer that our IP do not have yoghurt mode!
Hi Melannie, does your oven has a “breadproof” function? You can use that too. Another thought is that you can use the oven with the light on and then pour 3 cups of boiling water into a pan placed at the bottom rack and close the oven door to incubate?
Hello – Thanks for the recipe! Our instant pot do not have a “Yoghurt” settings.. do you have recommendation of another settings that we could use with the Instant Pot? We tried to do it in the oven last time… and it was successfully a failure T___T
I really miss eating tempeh
HI Melannie, how did you do it in the oven last time? did you turn on the oven light to keep it warm enough for the fermentation to happen? In regards to the yogurt setting, I’m not sure if this will work or not, but if you turn on the “keep warm” button for maybe 10-15 minutes and then turn it off (if you have a thermometer, that will be very handy in this case) and wait until the temperature is no more than 100 F before you put the soybeans in there for incubation. When the temperature is right, put the soy beans in there and then close the lid and wrap the instant pot in large towel to keep the warmth. I’ve never tried it myself that way, but just a thought!
Hi Marvellina,
Under the heading “IF YOU INCUBATE THE BEANS IN INSTANT POT :”
you say ” then continue to culture until about 48 hours.” Do you mean continue to run the instant pot with the soybean packets in it, don’t run the instant pot and put the soybean packets back in it, or let the soybean packets sit outside of the instant pot?
Thanks for the clarification. I’m excited to try your method.
Sheila
Hi Sheila, I apologize if I confused you. Basically I cultured the tempeh inside the instant pot for 48 hours. I first set the timer to 14 hours first for yogurt function just so that I remember to check on them and wipe off some condensation that builds up inside the cover of the IP. Then after that I continue to culture it still using yogurt function and set the timer to 35-38 hours. You may not even need to culture it to up to 48 hours. The spores may have covered the beans all white before then and you can stop culturing. I hope it makes sense? Please feel free to reach out again if it’s not 🙂
Hi, where do you get the tempeh starter? I live in Sydney.
Thanks
Hi Monica, I’ve got it before from this manufacturer https://shop.culturesforhealth.com/collections/tempeh-soy and from Amazon (the same manufacturer).