This post may contain affiliate links. Please read our disclosure policy.
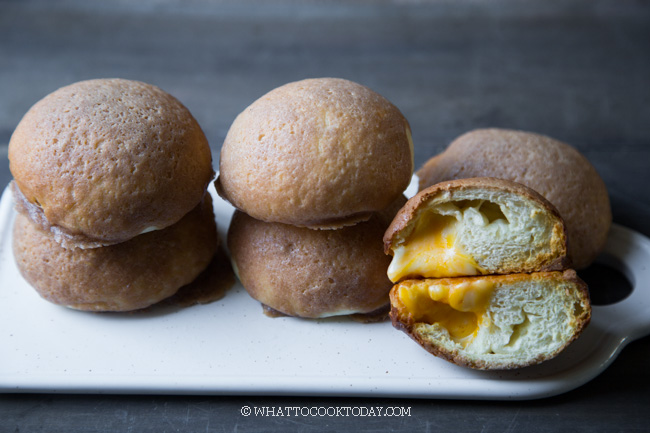
Bolo bao is another name for Cantonese pineapple buns. These buns are soft, fluffy, and slightly sweet, and are topped with crackly crunchy cookie topping, which resembles the texture of a pineapple. I’m also sharing 3 different sweet filling options.
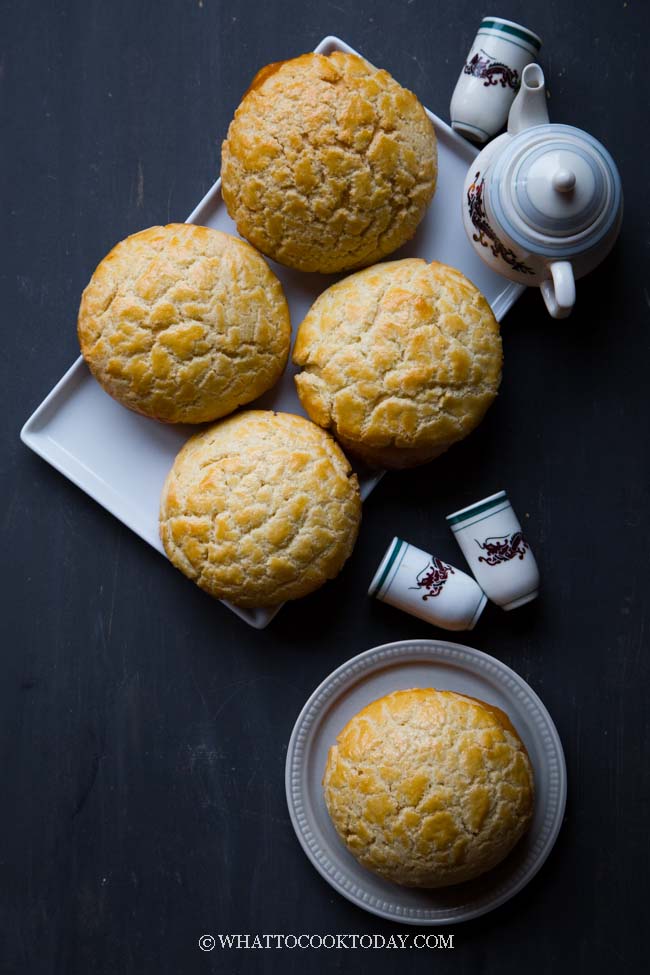
What is Bo lo bao/ po lo bao ?
Po lo bao or pineapple buns is a popular snack in Hong Kong and many Asian countries by now. Despite the name, the buns contain no actual pineapple. Instead, they are named after the crackly crunchy cookie topping, which is said to resemble the texture of a pineapple.
The history of Hong Kong pineapple buns dates back to the mid-20th century when they were first introduced to the city by Chinese immigrants from Guangdong. Since then, they have become a staple food in Hong Kong, sold in bakeries and cafes throughout the city.
One of the most famous places to enjoy a Hong Kong pineapple bun is the chain of bakeries named Kam Wah Café, which has been serving buns since the 1950s. Visitors can enjoy a freshly baked bun with a cup of coffee or milk tea, and watch as the bakers make the buns right before them.
Another unique aspect of bo lo bao is the crunchy cookie topping, which is made by mixing sugar, flour, egg, and butter. The cookie crust is draped on top of the bun before it is baked to perfection. The topping’s crunchy texture and sweet flavor sets the buns apart from other similar baked goods.
Filling options
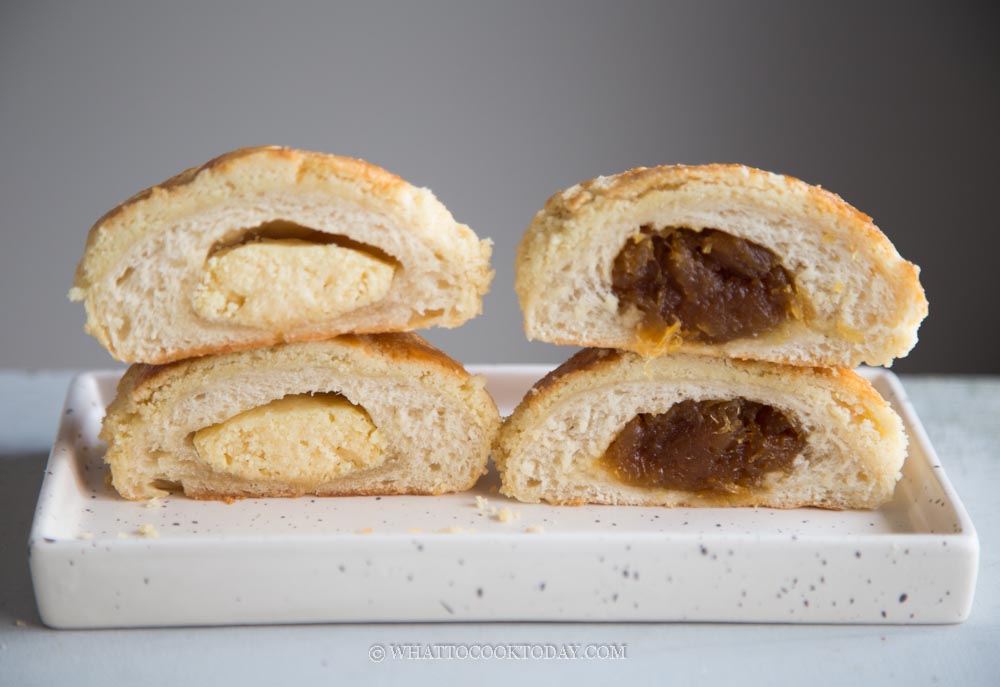
The choice between filled or unfilled is up to personal preference. Traditionally, they are unfilled, with the sweet, crunchy topping being the main attraction. However, some bakeries offer filled versions, with popular fillings being butter, custard, and one of the readers of this blog informed me that there was a dry milk powder filling. I was quite intrigued by that and decided to give it a try with my own “concoction”. The family likes it. I even decided to fill them up with leftover pineapple jam from making pineapple tart
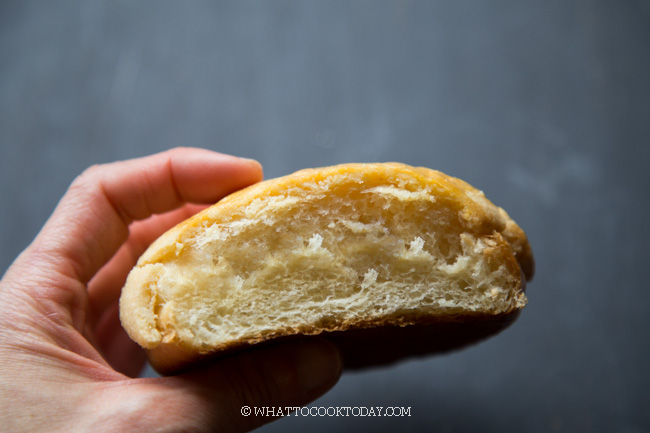
Why you’ll love this recipe
1. The cookie crust
I’ve tweaked the recipe several times throughout these years and this latest cookie crust are nicely cracked without any scoring and very airy and crunchy. It stays crunchy the next days too
2. The buns are so soft and airy
Tang Zhong method is the best for producing soft tearable bread and buns like this
Po Lo Bao / Bo Lo Bao (Hong Kong Pineapple Buns)
Ingredients
Tangzhong:
- 15 gr bread flour
- 90 ml whole milk
For the dough:
- 300 gr bread flour with at least 12% protein content
- 5 gr instant yeast
- 30 gr sugar
- ⅛ tsp salt
- 15 gr milk powder
- 120 ml whole milk
- 50 gr egg weight is without the shell
- 40 gr softened butter
Cookie crust:
- 75 gr butter softened
- 75 gr caster sugar see notes
- ⅛ tsp salt
- 18 gr egg yolk (room temperature) about 1 small egg yolk
- ½ tsp vanilla extract
- 95 gr all-purpose flour
- ¼ tsp baking powder
- ¼ tsp baking soda
- Milk as needed
Egg wash:
- 1 egg yolk
- ½ tsp milk
Dry milk powder filling (optional):
- 70 g unsalted butter softened
- 20 g powdered sugar
- 70 g milk powder
- 15 g eggs room temperature
Other filling options:
- 1 recipe firm custard filling
- 350 g Pineapple jam
Instructions
Prepare the milk filling (optional):
- Combine all the ingredients in a mixing bowl. You will get a dough-like consistency. Divide into 8 portions and roll into round balls. Keep them covered in an air-tight container and keep in the fridge if you prepare this few days before. Simply let them come to a room temperature to soften a bit before wrapping
Prepare tangzhong:
- Place milk and the bread flour in a small saucepan. Whisk until there is no more lumps. Cook this mixture over low-medium heat until it reaches 65 C (149 F). Remove from the heat and cover with a plastic wrap, touching the tangzhong so the skin won't form. I highly suggest using this the next day instead of using it on the same day. Store this in the fridge
Prepare the dough:
- If you keep tangzhong in the fridge, take it out to let it sit at room temperature for about 30 minutes or so. Mix all the dry ingredients together in a mixing bowl. Make a well in the center and pour in the wet ingredients and the tang zhong you made earlier. Use a dough hook attachment to knead the dough on speed 2 until all the crumbly dough starts to come together into one mass, it may take about 2-3 minutes for this to happen. Don't be tempted to add any liquid. You may need to stop halfway and scrape the dough off the hook and the sides of the bowl and knead again for another 3 minutes
- Gradually add in the softened butter bit by bit. The dough will turn into a REAL sticky mess again because of the butter, just keep kneading and stop halfway and scrape the dough off the hook and bowl again and continue to knead until the butter is absorbed by the dough. IT WILL HAPPEN, don't worry! DO NOT be tempted to add any extra flour. You will get a shiny smooth dough that is very elastic. This may take about 10-15 minutes on speed 4. The dough must pass a windowpane test, meaning, when you stretch a small amount of dough thinly, it won't break and a light can pass through
- Place it in a lightly oiled bowl and let it rise in a warm place for 1 hour or longer depending on the temperature. It will double in size. In wintertime, I use my oven bread proof function to do this.
Prepare the cookie crust (can be done the day before too):
- Combine the flour, sugar, salt, baking powder, and baking soda in a mixing bowl and set aside. Add softened butter and mix with the dry ingredients into crumbles. Add the yolk and vanilla and mix into a moist cookie dough but not too sticky. If the dough seems dry, you can add a splash of milk, about 1/2 teaspoon at a time to get into a moist cookie dough. If the dough is a bit sticky, cover the dough with a cling wrap and refrigerate for about 30 minutes to help it firm up and easier to work with
- Divide into 8 portions. Work with one at a time. Use your hand to knead the dough briefly and you can feel that the dough will soften slightly. Place the cookie dough in between two cling wraps. Use a rolling pin to roll it out into a 4-inch circle
- Cover with a cling wrap and refrigerate while you work on the dough
Shape the dough and 2nd proofing:
- Once the dough has doubled in size, punch the dough down and then roll it into a long log and cut into 8 large pieces. Stretch the edge of each piece and tuck it back into the middle to form a smooth round ball.
- If you want to fill the buns with custard, flatten it into about 4-5 inch circle and place the filling in the middle and gather the sides to enclose the buns. Roll it into a smooth round ball. Placed on a parchment paper (seam side down) about 2-inch apart. Let them proof again for another 40 minutes or until they double in size again
Put the bun + cookie crust together:
- Preheat oven to 390 F (200 C) 15 minutes before the end of 2nd proofing for the bun, get the cookie dough out from the fridge.
- Mix the egg yolk with water for egg wash.
- Brush the surface of the bun with some egg yolk wash. Put the cookie dough gently on top of the proofed buns. Repeat with the rest of the cookie dough and proofed dough. Gently brush it on top of the cookie dough. Repeat with the rest
- Place in the oven 3rd rack from the top and bake them for 13-15 minutes for large buns or until internal temperature is at least 190 F (88 C). The cookie crust would be golden brown. Remove from the oven and transfer to a cooling rack to let them cool down a little bit before serving. They are best served warm and can be kept up to 5 days at room temperature
RECOMMEDED TOOLS
Marv’s Recipe Notes
*Nutrition facts are just estimates and calculated using online tools*
How to make po lo bao from scratch
1. I use my basic tang zhong milk bread recipe
I pretty much use this basic tang zhong bread/bun recipe for most of the Asian-style baked buns here
2. Prepare the cookie crust topping
Combine the flour, sugar, salt, baking powder, and baking soda in a mixing bowl and set aside. Add softened butter and mix with the dry ingredients into crumbles. Add the yolk and vanilla and mix into a moist cookie dough. If the dough seems too dry, you can add a splash of milk, about 1/2 teaspoon until you get a cookie dough. If the dough is a bit sticky, cover the dough with a cling wrap and refrigerate for about 30 minutes to help it firm up and easier to work with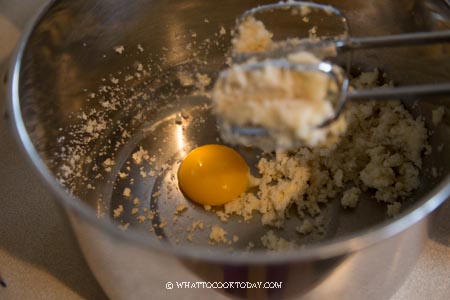
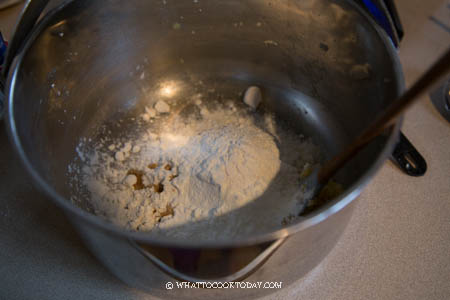
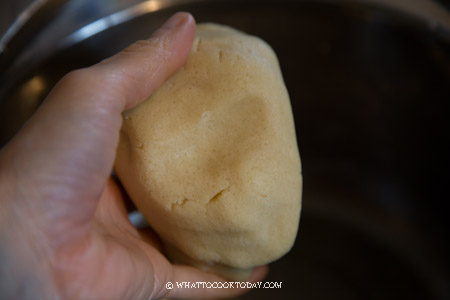
3. Divide into 8 portions. Work with one at a time. Use your hand to knead the dough briefly and you can feel that the dough will soften slightly. 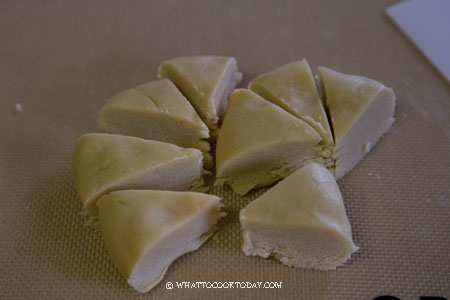
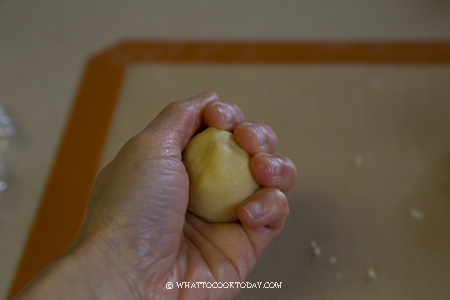
4. Place the cookie dough in between two cling wraps. Use a rolling pin to roll it out into a 4-inch circle. Cover with a cling wrap and refrigerate while you work on the dough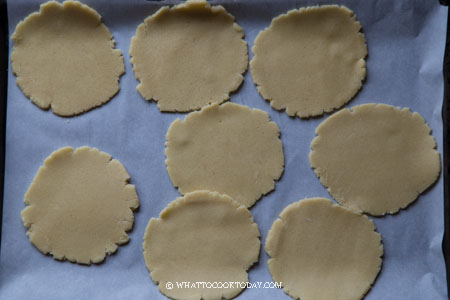
5. Once the dough has doubled in size, punch the dough down and divide into 8 large pieces. Stretch the edge of each piece and tuck it back into the middle to form a smooth round ball. If you want to fill the buns with custard, flatten it into about 4-5 inch circle and place the filling in the middle and gather the sides to enclose the buns. Roll it into a smooth round ball.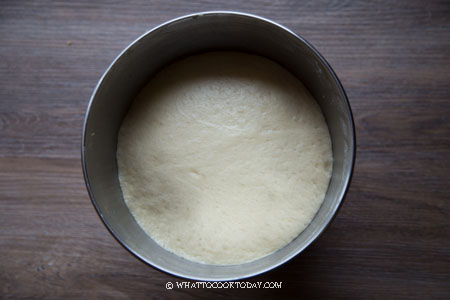
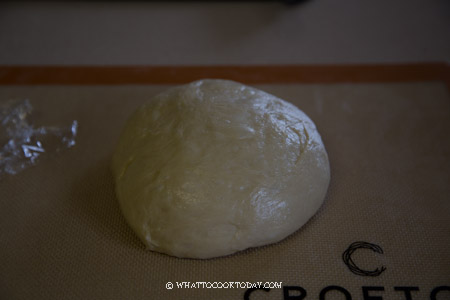
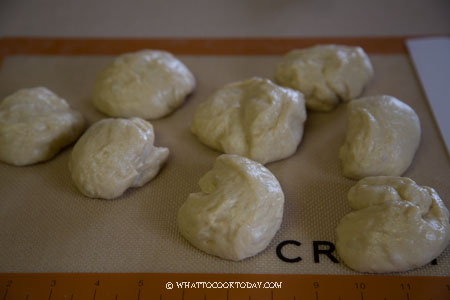
6. Let them proof again for another 40 minutes or until they about 1.5x original size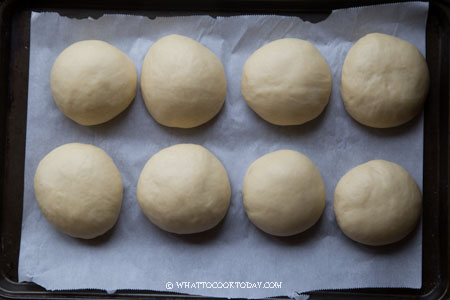
7. Preheat oven to 390 F (200 C) 15 minutes before the end of 2nd proofing for the bun, get the cookie dough out from the fridge. Mix the egg yolk with water for egg wash.
8. Brush the surface of the bun with some egg yolk wash. Put the cookie dough gently on top of the proofed buns. Repeat with the rest of the cookie dough and proofed dough. 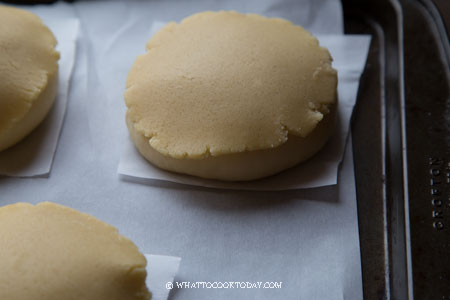
9. Gently brush it on top of the cookie dough. Repeat with the rest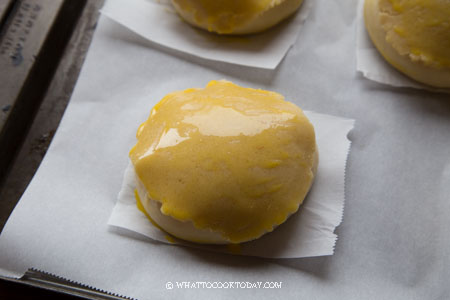
10. Place in the oven 3rd rack from the top and bake them for 15 minutes for large buns or until internal temperature is at least 190 F (88 C). Remove from the oven and let them cool down a little bit before serving. They are best served warm
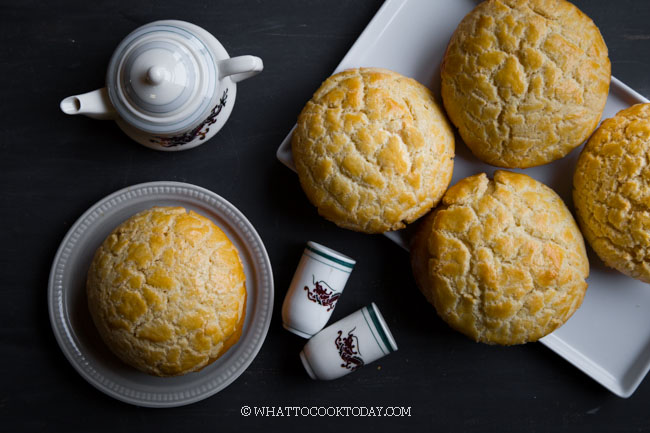
How to store and reheat bo lo bao
Leftover Hong Kong pineapple buns can be stored in an airtight container at room temperature for up to 5 days if they have no filling, with milky filling, or pineapple jam filling. If they have custard cream filling, they need to be kept in the fridge. They can be kept in the refrigerator for about 5 days. The longer you keep them in the fridge, the drier the buns become. If you want to keep them for a longer period of time, keep them in the freezer for up to 1 month.
To reheat, place the buns in a microwave-safe dish and heat in 30-second increments until they are warm and soft. You can also reheat them in a conventional oven at 350°F for 8-10 minutes or until they are warm.
The buns are so soft and airy contrasting with the cookie crust on top! If you cut a warm bun in half and slide a slice of cold butter in there…oh my! You get the idea.

You may also like this roti boy recipe



27 comments
I tried to respond to your response, but could not manage it. I must have made some . However, the main point is that I made these according to your recipe, and they turned out beautifully. I will offer them tomorrow morning at breakfast, so I do not know just now how they will taste, but I am sure that they will be wonderful. I made a moderately firm pineapple filling that I firmed up with eggs and a bit of flour… sort of like a lemon curd, but stiffer. This is very exciting. There are so many possibilities. So exciting. There will be so many to whom I can now bring delight in these hard times.
Hi Sunshine, sorry for the trouble in replying. I’ll take a look into that. I’m so glad the po lo bao turned out beautifully for you and with nice pineapple filling too. You are right that there are so many possibilities with the filling 🙂 You will surely bring “sunshine” into their lives during this unusual time 🙂 Thank you for sharing!
What happens if you put a pineapple filling in the bun before baking? Do you think that would work? Would it “explode” (not violently) and make a mess in the oven?
Hi Sunshine, yes it should work. If your filling is firm and not so “watery” and you seal it well when you wrap, it shouldn’t leak out and make a mess. But it shouldn’t explode, the filling may just ooze out if you don’t seal properly.
Hello! The buns look amazing!
Just 1 question, can we substitute cornstarch with cornflour?
Thanks in advance!
Hi Wy, in Asia I know cornflour and cornstarch are the same thing (a pure starch extracted from the corn). Here in the U.S., cornflour means the whole corn is grind, so it has a coarser texture. We need the “starch” only though, not the flour. As long as you are using the starch kind (whether it’s called cornstarch or cornflour) it will work, just don’t use the “flour grind from the corn”. Hope it makes sense.
I started off the day thinking I’ll make your char siu bao recipe. Then thought since I have time to kill I’ll try your potato curry bun but with char siu filling. Then I remembered your crackly looking bo lo bao and decided to do that with char siu filling – just like the one at Tim Ho Wan. And my oh my… I couldn’t be more ecstatic with the results! I was worried about the cookie dough initially. It didn’t look like it was going to come together at all. And I couldn’t roll it out – they just disintegrated into crumbs! Ended up using heel of my palm to gently flatten dough into the size I wanted. So glad I persevered. They came out of the oven so crackly looking like yours! The combination of the soft bun and crispy top with sweet/savory char siu (also your recipe!) was really satisfying for an afternoon snack. Will definitely make again. And experiment with inti filling this time 😉.
Hi Sue, I’m so glad it turned out for you! yay! the cookie dough is not exactly the easiest to work with but it made nice crackles on top 🙂 ohhh…inti filling! I love coconut inti!!! I wish I could have a polo bao now lol!
Thankyou, made these today and they were so delicious! Only problem was I didn’t adjust the cooking time for smaller buns (I made 16) and they turned out quite brown.
If I wanted to make a bigger batch next time do you think I could double the recipe? Would the kitchen aid handle a bigger batch of dough?
Thanks again x
Hi Hester, thank you for your feedback. Now I know I should’ve warned people to watch the time if they make smaller buns. Thank you! I’m glad you still find them delicious though. I’ve made this with double recipe with my kitchen aid 4 1/2 quart mixing bowl. But that’s the max though, can’t go more than that ha.ha..!