This post may contain affiliate links. Please read our disclosure policy.
Learn how to make basic soft fluffy Chinese baozi/mantou that can be made with or without filling or different shapes and flavors as you wish. All the tips you need to know and a step-by-step video to help you make smooth soft steamed buns with this recipe.
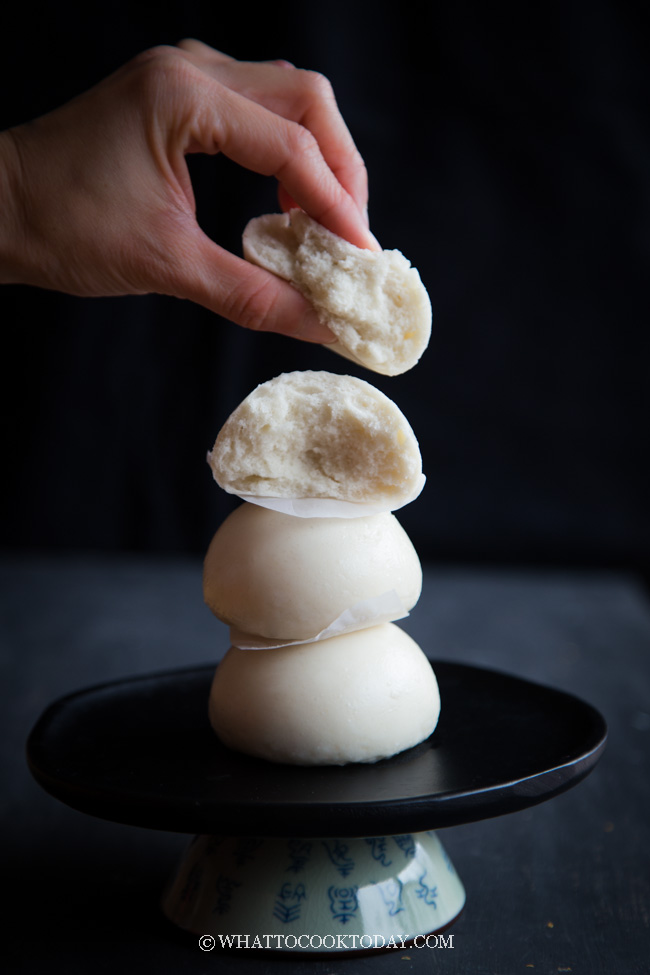
Are you getting tired of making steamed buns that come out wrinkly or collapse or simply just not smooth? I used to wonder why in the world perfectly-proofed buns come out horrible after steaming. As you read through the post below, you will find the reasons why. Making basic steamed buns is not complicated if you get the right tips and of course like they say practice makes perfect. Let’s get started guys!
What is bao bun (Steamed buns)?
Bao buns, also known as baozi (包子), are a cherished staple in Chinese cuisine. These yeast-leavened buns are traditionally steamed, resulting in a soft, fluffy texture. They can be filled with a variety of sweet or savory ingredients, such as seasoned pork, vegetables, or sweet red bean paste. The term “bao” translates to “bun” or “to wrap,” reflecting the bun’s characteristic of encasing delicious fillings.
The dough for bao buns typically includes flour, yeast, sugar, and a leavening agent, creating a slightly sweet and airy bun that complements a wide range of fillings. Whether enjoyed as a savory snack or a sweet treat, bao buns offer a versatile and delightful culinary experience.
Why we love this recipe
1. You only need to proof the dough once
Unlike most steamed buns recipes where you need to proof the dough once, shape, and then proof again before you can steam. This recipe only requires one-time proofing
2. It’s faster to make
Because you only need to proof the dough once, it saves a bit of time here
3. A basic steamed buns recipe that can be easily modified
This is a basic steamed buns recipe with no filling that you can adapt to fill with a sweet or savory filling or shape into different kinds of shapes you wish
4. Have I mentioned soft,fluffy, and slightly chewy?
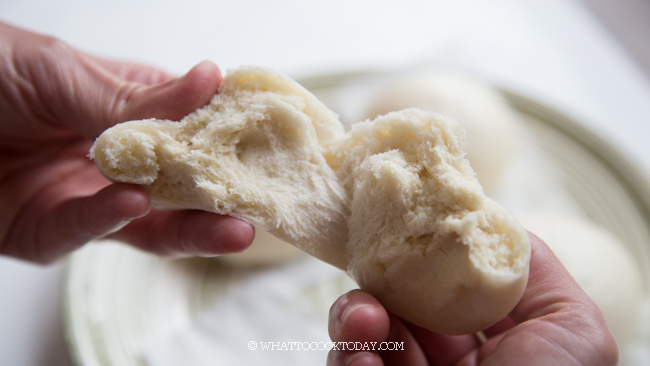
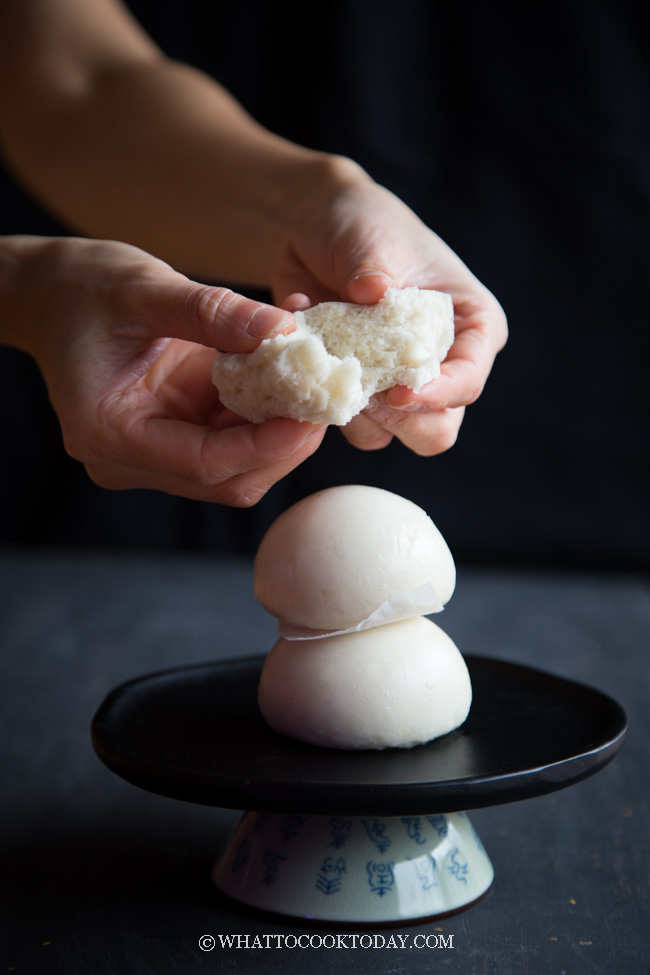
I truly love this steamed buns recipe for its simplicity and how soft and fluffy the result is yet it has that texture like bread you can tear layer by layer. If you add yudane or tangzhong to the dough, your steamed buns will remain soft for days to come. It’s incredible and highly recommend adding yudane or tangzhong (details below)
Ingredients and Substitutions
1. All-purpose flour
This recipe uses all-purpose flour for its balance of protein and tenderness.
Substitute: For extra soft and white buns like those at dim sum restaurants, use bleached low-protein flour such as Hong Kong flour or cake flour. You can also do a blend of all-purpose flour and cornstarch (90:10 ratio by weight) for a similar effect.
2. Wheat starch (option 1 in the recipe)
Wheat starch is the starch extracted from the wheat. So it’s not the same with flour, which the wheat is grind into flour. Wheat starch gives the buns a smoother and tender crumb.
Substitute: If unavailable, you can try using cornstarch or potato starch in a pinch, but texture and color may differ. Wheat starch is highly recommended for best results.
3. Cake flour (option 2 in the recipe)
Used for its low protein content, which helps create very soft and fluffy buns.
Substitute: If cake flour isn’t available, you can make your own. Here’s how to make: Sift together 110 grams (3/4 cup + 2 Tbsp) of all-purpose flour with 16 grams (2 Tbsp) of cornstarch. Store them in an air-tight container and use the amount you need. Simply double or triple the amount to make extra
4. Instant yeast
Instant yeast works well because it can be mixed directly into the dry ingredients without proofing.
Substitute: Active dry yeast is fine too—just dissolve it in the warm liquid with a bit of sugar and let it sit until foamy (about 10 minutes) before using. If you use fresh yeast, the general rule of thumb is to use 4 times the amount of instant yeast. So in this case, 4 grams of instant yeast would be 16 grams of fresh yeast.
5. Sugar
Sugar adds just a touch of sweetness to balance the flavor and helps feed the yeast.
Substitute: Honey or maple syrup works, but may slightly change the color and flavor of the buns.
6. Oil
Neutral-tasting oil like vegetable, canola, or avocado oil keeps the buns soft and moist.
Substitute: Melted coconut oil or even unsalted butter can be used, though butter will add a richer taste, but the buns may not be as soft at room temperature because coconut oil and butter are solid at room temperature
7. Milk or Water
Milk gives the buns a slightly richer and softer texture.
Substitute: Water works well too, especially if you want to keep it dairy-free. For a non-dairy milk, choose unsweetened soy or oat milk for the closest result.
8. Baking powder
Sometimes added for an extra boost of fluffiness and to help maintain the bun structure after steaming.
Note: Not strictly necessary, but a helpful addition especially if your buns tend to wrinkle or deflate post-steaming.
Tips for making smooth bao buns
I’ve been getting some questions from my readers that their steamed buns come out not smooth even after pushing out all the air. I have inconsistent results sometimes with the steamed buns being not smooth. Here are some tips I’ve learned after making LOTS of steamed buns:
1. USE ROOM TEMPERATURE OR COLD LIQUID
Instead of using warm liquid (milk or water), I start with room temperature liquid, such as cold milk or room temperature water. That way, the yeast doesn’t work immediately while you are trying to shape the buns. It helps a lot not to have all those air bubbles while shaping
2. SMOOTH AND SHAPE IT TALL
Please refer to the video in the recipe card below to see how a few simple steps can help you to make the buns smooth, round, and tall
3. ONLY PROOF ONCE
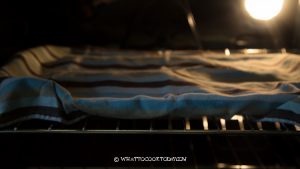
Place the dough in a warm place. I use my oven bread proof function. The dough will puff up to about 50% of its original size at a warm temperature (between 75-95 F / 24-35 C). If it’s colder where you are, it will take longer.
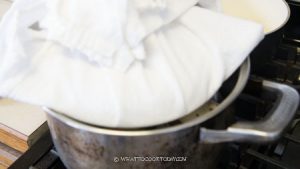
4. WRAP THE LID OF THE STEAMER WITH A CLOTH
The condensation collected on the lid will drip back to the steamed buns and create burn spots. By wrapping the lid with a cloth, you easily prevent this from happening
5. STEAM THE BUNS OVER MEDIUM HEAT
High heat will make the buns not smooth and expand to the side. I set the fire on medium now. I used to do Medium-high heat and the results weren’t consistent, sometimes I got smooth buns, sometimes I didn’t. But I always get smooth buns when I steam on medium heat
6. LEAVE ABOUT 1/2-INCH GAP TO LET STEAM ESCAPE DURING STEAMING
I’ve tested this method several times and the results were good and have been very consistent in producing mantou with the smooth surface when you steam over medium heat this way. Even when you have overproof the steamed buns, the steamed buns do not collapse and wrinkle, the buns will just expand to the side more after steaming
7. DON’T RUSH TO OPEN THE LID AFTER STEAMING
Let the steamed buns rest in the steamer for 3 minutes or so before opening the lid so your steamed buns won’t collapse and shrink due to the sudden change in temperature
Having issues? Troubleshootings for steamed buns
I have made steamed buns A LOT in the past few years and I’ve learned from some of the flops to share with you and hopefully, you don’t have to go through the same.
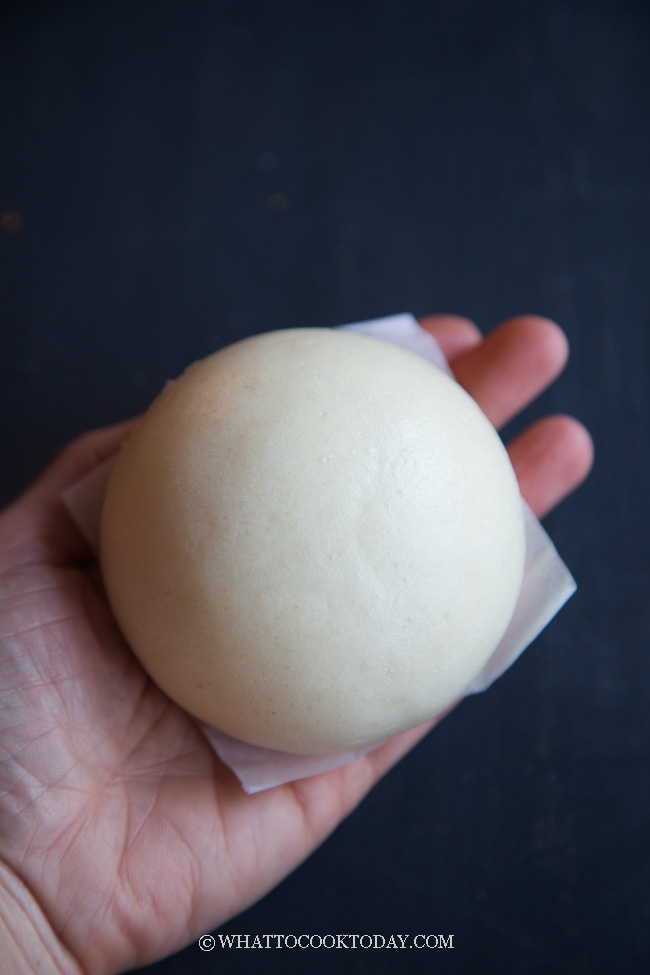
1. STEAMED BUNS COLLAPSE OR COME OUT WRINKLY
-Make sure the liquid is not warm
You want to start the dough “cold” by using cold milk or at least room-temperature water. So the yeast is not active while you are shaping the dough, which creates lots of air bubbles and hence, an unsmooth surface.
-Overproofing (read how to tell if the dough is done proofing and how to prevent over proofing below)
Yes, over-proofing is a problem too. When you let the dough proofs for too long, it will weaken the dough and when you steam it, it will collapse and cause that wrinkle and the buns will spread to the side making them look wide and flat.
-Air bubbles and not shaping them smooth
Make sure you push all the air bubbles out after resting for 15 minutes. Re-knead the dough a few times and then fill and shape the buns according to what you want to do. Make sure the surface of the buns is smooth or they will come out well..not smooth after steaming.
-Steaming over high heat
When I steam the buns over high heat, they always come out bumpy and simply not smooth. But once I adjust the heat to medium with the lid slightly ajar, the buns come out smooth.
-A sudden change in temperature
This is less likely the cause for severe wrinkles on the steamed buns, but the sudden change in temperature may sometimes cause the steamed buns to retract and sometimes even collapse and shrink causing the wrinkles once they cool down completely. Let them stay in the steamer for 3 minutes after you turn off the steamer.
-Another culprit usually is the filling inside the buns. Too much moisture in the filling will make the bun wrinkle and collapse too.
2. STEAMED BUNS ARE CRUMBLY AND CAKEY
– Not enough gluten development
You want to make sure to knead until the dough is smooth, silky, and elastic. Gluten is what contributes to the structure and that nice stretchy and “tearable” buns/bread
– Dough is too dry
This usually happens, especially when you knead by hand. Most of the time we keep adding flour to help with the kneading. Dough may feel very sticky at the beginning when you knead by hand but will get better as you knead because gluten has developed. If you keep adding flour, the buns will come out dry and super crumbly
– Not enough hydration
You want to make sure to add enough liquid so a rough dough can come together and continue to knead until it’s a smooth and soft dough. Don’t be afraid to add more liquid if the dough feels stiff
FAQ for steamed buns
1. WHAT TO SUBSTITUTE FOR CAKE FLOUR?
Here in the U.S., cake flour is widely available, but it has been brought to my attention that cake flour is not available or any bleached flour is banned in Europe and Australia. You can use regular plain flour (we call it all-purpose flour in the U.S.) and add cornstarch to it. Here’s how to make 1 cup of cake flour: 1 cup of all-purpose flour (about 110 gr) + 16 grams (2 Tbsp) of cornstarch. This will help to soften the steamed buns compared to just using all plain flour. DO NOT SUBSTITUTE CAKE FLOUR WITH SPONGE MIX (Cake flour is not available in Europe and sponge mix is more common).
2. WHY HOMEMADE STEAMED BUNS ARE YELLOWISH IN COLOR?
This is the question I was asked often when it comes to making steamed buns at home. If you use the premixed steamed buns flour that you bought from the store, the result usually is white in color. The answer is because of the flour. The flour has been treated or bleached to give you that white result. You don’t have to use bleached flour. Regular unbleached flour will still give you great steamed buns.
3. DOES VINEGAR HELP TO WHITEN STEAMED BUNS?
I tried that before several times and the answer is No. I thought it would work some magic, but it didn’t happen.
4. DO WHITE STEAMED BUNS TASTE BETTER?
Not necessarily. Don’t let the color fools you. Just because you produce some yellow buns, they can still be soft, fluffy, and delicious! The color doesn’t really affect the taste.
5. HOW TO TELL IF THE SHAPED DOUGH IS DONE PROOFING AND READY FOR STEAMING
–Visual
They won’t increase in size by much, ideally, only about 50% of their original size
-Feel
The dough feels light and airy when you lift it up, no longer dense and heavy like dough before you shape them
-Finger test
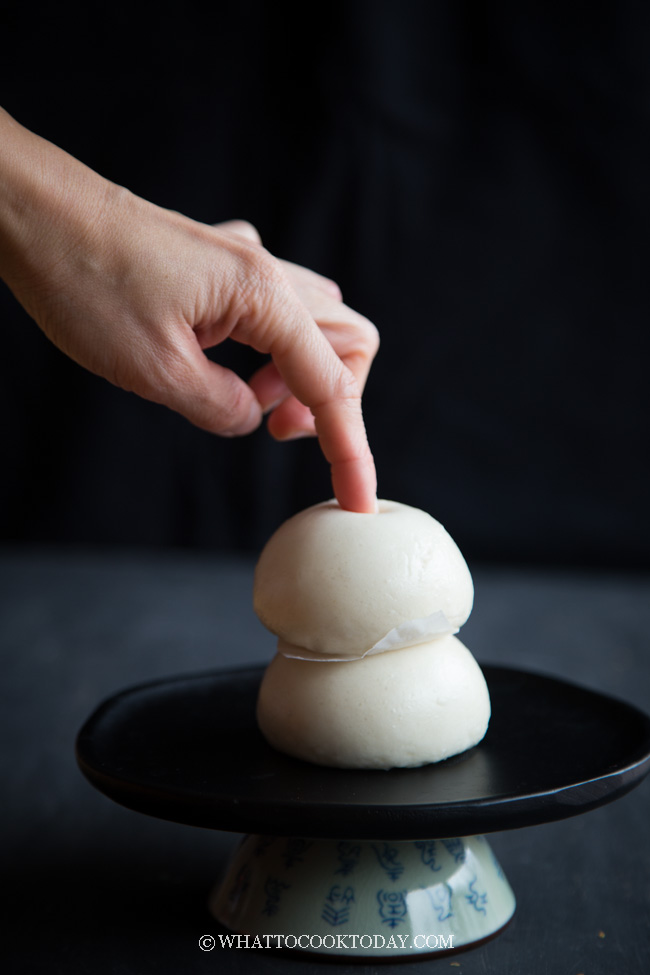
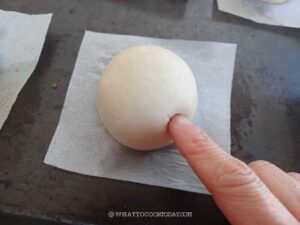
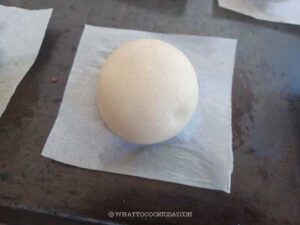
When you gently push on the dough, it will leave an indentation but will spring back slowly but you will still see some indentation. This dough is perfectly proofed. If it springs back right away, it needs to be proofed a bit longer. If it never springs back, then you have over-proofed the dough. If you proceed to steam, they are most likely going to be dense and tough because gluten is not developed enough in under-proofed dough and has weakened in the over-proofed dough.
6. HOW TO STOP THE DOUGH FROM OVER-PROOFING?
Most likely your steamer won’t be able to accommodate all at one go. You may need to steam in 2-3 batches, which means, the rest of the batches will sit longer and continue to proof while waiting for the steamer. Not good for the buns! Here’s what you can do: Make sure the cover them with plastic wrap and then place them in the refrigerator to slow down the yeast activity or halt it together until they are ready to be steamed
7. HOW TO RESCUE OVER-PROOFED DOUGH?
So, you did a finger test, you gently push on the dough and it never springs back. Ouch!! over-proofed! If you continue to steam them, they will collapse and come out dense. Here’s how to fix it: Gently push down on the dough to flatten and then reshape it and let it proof again following the same instruction as before for proofing. It may not give you an ideal outcome after steaming, but that’s the only thing you can do now
8. HOW TO STEAM MANTOU WITHOUT A STEAMER OR BAMBOO BASKET
You don’t need an actual food steamer or bamboo basket to steam food. I don’t have any food steamer. You can set it up by using:
– Large wok/large pot with a lid
– Metal trivet or wide and low heat-proof glass jar: this is to put a plate/tray on top for the food you want to steam
– A heat-proof plate or tray (that can fit into your wok or pot) to sit on top of the trivet: this is where you put the buns to be steamed
How to store and reheat baozi
Storing: If you make extra and plan to store them, let the already steamed buns cool down completely and then place them on a baking sheet, not touching each other, and then put the entire tray inside the freezer for about 1 hour. They will harden but are not completely frozen yet. Transfer to a freezer bag and they will not stick to each other anymore. Try not to keep it for more than 1 month.
Reheating: They can go straight from the freezer to the steamer. Steam on medium-high heat for 5 minutes
Our popular savory or sweet baozi/bao buns
This recipe can be used for other types of steamed buns that are filled with savory or sweet fillings such as these:
Dou Sha Bao
Char Siu Bao
Pumpkin Flower Steamed Buns
Momofuku Steamed Pork Buns
Easy Sweet Piggy Steamed Buns
Scallion Steamed Buns (Hua Juan)-2 ways
Spiral Mantou Recipe
Pandan Liu Sha Bao
Other bao buns recipes
Steamed buns with tangzhong or yudane
Super Easy No-Knead Chinese Steamed Buns
Soft and Fluffy No-Yeast Chinese Steamed Buns
Instant Pot Steamed Buns
Whole Wheat (wholemeal) Steamed buns
Sourdough Steamed Buns
Soft Fluffy Steamed Bao Buns Recipe and Video (Baozi/Mantou)
Ingredients
Option 1:
- 300 g all-purpose flour plus more for dusting
- 60 g Wheat starch see notes 1
Option 2:
- 180 g all-purpose flour plus more for dusting
- 180 g cake flour
Dough for option 1 and 2:
- 4 g Instant yeast see notes 2,3,4,5
- 30 g sugar see notes 6
- 2 Tbsp cooking oil
- ½ tsp salt
- 1 tsp baking powder
- 200 g cold milk plus more as needed, see notes 7
Instructions
- For tangzhong or yudane version, you can find the recipe in this post
Prepare the dough with a machine:
- Place the flour and starch, instant yeast, sugar, salt, baking powder, milk and oil in a mixing bowl of a stand mixer fitted with a dough hook attachment. Give it a stir using the hook to roughly combine so the dry ingredients won't "fly" all over the place when you start the machine

- You may or may not need more liquid. If the dough feels dry and stiff, add a bit more milk, one teaspoon at a time. Continue to knead at low speed (speed 2 on KA) for 12-15 minutes or until the dough is smooth and elastic. It may feel slightly sticky to the touch and that's okay.

- You don't need to develop a window pane here but the dough needs to be smooth and elastic. Oil your hands a bit to help you pick up the dough and to prevent the stickyness
Prepare the dough by hands:
- Place the flour/starch combination (either option 1 or 2), instant yeast, sugar, salt, baking powder, and oil in a mixing bowl. Start with 180 ml of liquid, most likely you will need more liquid than called for in the recipe. I usually need about 180-200 ml of liquid. Mix until you get a rough dough (it's not going to be smooth yet). Cover and rest it for 15 minutes
- Then go back and knead it. You'll be surprised by how easier it is to knead it now. Knead until the dough is smooth and pliable. The kneading motion is like washing a cloth by hands. At any point during kneading, you can always stop and rest the dough if you find it hard to knead and so much resistant. This is to relax the gluten. Then go back to knead again and you'll be surprised by the difference it makes by just resting the dough before kneading again. It's easier for you too. You want the dough that is smooth, silky, and elastic. Just to warn you that it's going to take some time to knead by hands. It may take 20-30 minutes total of time to knead by hands
If not using the dough on the same day:
- You can prepare the dough as directed above but use less yeast (decrease to 1/2 teaspoon). Then round up the dough and put in a lightly oiled air-tight container and put it in the fridge immediately for no more than 24 hours. We are delaying the fermentation here.
- When you are ready to fill and shape the dough, remove from the fridge and divide the dough as directed below. There is no need to let the dough come to a room temperature
If you are just making plain steamed buns with no filling (round shape):
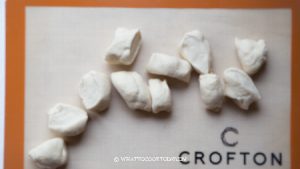
- Lightly dust your work surface with a bit of flour. Divide the dough into 10-12 equal portions.

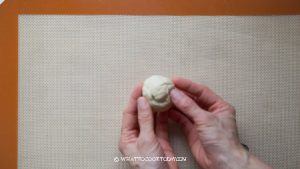
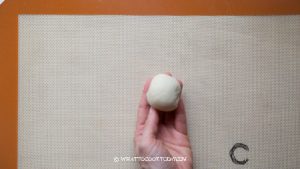
- Flatten and gather the edge to round them up into dough balls. Roll the dough into a smooth round ball in between the palm of your hand or as I did in the video. REALLY make sure the dough is smooth.


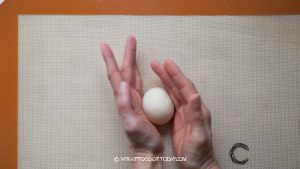
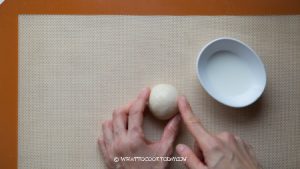
- Cup the dough with both palms and move the dough in a circular motion to shape it taller. This part is important so your steamed buns come out tall instead of spreading to the side after steaming

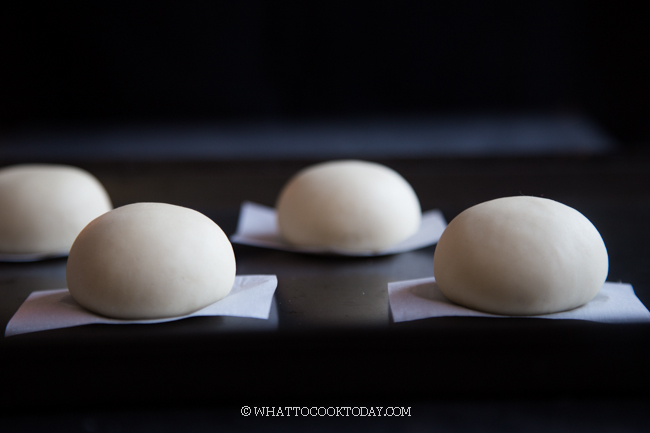
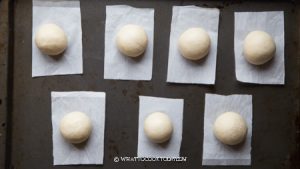
- Place on a piece of parchment paper. Lightly dab the surface of the bun with some milk using your finger to smooth the surface. You can also mist with some water using a spray bottle. Loosely cover with clean kitchen towel to prevent drying. Work with another dough and do the same. Proceed to proofing after that


If you are going to make steamed buns with filling:
- Lightly dust your work surface with a bit of flour. Divide the dough into 10-12 equal portions. Flatten and gather the edge to round them up into dough balls. Cover and rest the dough for 5 minutes. This is not to proof the dough. It shouldn't double in size. This is to relax the gluten for easier shaping and rolling the dough, then proceed to the next step that's applicable to you
- Work with one dough at a time. Flatten the dough with your palm and then use a rolling pin to roll it out to form a circle about 4-5 inches, with a slightly thicker middle part. This is to support the weight of the filling. Don't roll the dough too thin. If you roll the dough too thin, the filling might make the steamed buns "wrinkle" later when you steam. Place the filling at the center and then gather the sides to enclose the bun and pinch to seal. Flip the bun so the seam side is down now
- Cup the dough with both palms and move the dough in a circular motion to shape it taller. This part is important so your steamed buns come out tall instead of spreading to the side after steaming. Repeat with the rest of the dough. Cover with a clean kitchen towel and proceed to proofing
For mantou shape:
- Roll the dough into a long log and use a dough cutter to cut into 8-10 equal portions using a serrated knife is best so it won't squish the dough down. Lightly dab the surface of the bun with some milk using your finger to smooth the surface or mist with some water using a spray bottle. Proceed to proofing step below
Proofing:
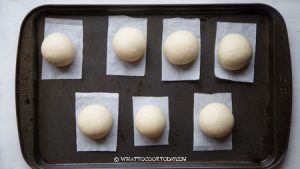
- Let the dough rise at room temperature or at a warm place. If it's winter where you are, you can use your oven "bread proof" function to let them proof in there, or simply turn on your oven to the lowest temperature and then turn off and after 15 minutes, place the shaped buns in there to let them proof. They won't necessarily double in size, but at least puff up to about 50% of the original size. This may take about 1 hour or longer at a warm temperature. If your dough has been in the fridge, it will take much longer to proof the dough. Don't go by the time however. Observe the dough instead!

- For active dry yeast and fresh yeast, you may need a bit longer for it to proof compare to instant yeast. If you use more sugar in the recipe, you may need to proof a bit longer too. Do not overproof your dough however
- How do you know if your buns have proofed ? They will be about 50% bigger than their original size AND when you lift them up, they should feel significantly lighter. If not, let them proof a bit longer. They may not visually look bigger.

- Use a finger test too. Gently push on the dough with your finger

- It will leave an indentation but it will spring back slowly. This dough is perfectly proofed. If it springs back right away, it needs to be proofed a bit longer. If it never springs back, then you have over-proofed the dough. Loosely cover them with plastic wrap and put the over-proofed buns in the fridge to slow down the proofing while waiting for the steamer

- An under proofed buns will be very dense and have bumpy surface after steaming. An over proofed buns may widen to the side and much flatter, but they shouldn't be dense and heavy. So, overproof may still be a bit "safer" compared to the buns not sufficiently proofed. Ideally, we want it to be perfectly proofed of course 😉
Steaming:
- Most likely your steamer won't be able to accommodate steaming all buns at one go. You may need to steam in 2-3 batches, which means, the rest of the batches will sit longer and continue to proof while waiting for the steamer. Here's what you can do: Make sure to cover them with plastic wrap and then place them in the refrigerator to slow down the yeast activity until they are ready to be steamed
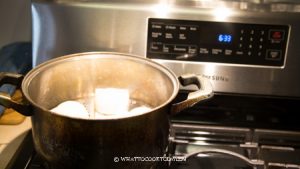
- Fill up the steamer with water but do not turn on the stove yet. Carefully arrange the proofed buns in the steamer, giving about 2 inches of space in between as they will expand quite a bit. Cover with a lid wrapped with a cloth to prevent condensation from dropping on the surface of the buns. If you use a bamboo steamer, you don't need to wrap the lid as bamboo steamer absorbs liquid

- Please note that I use the largest burner on my stove. Different sizes of burners will produce different amount of heat, so use your largest burner. TURN THE HEAT TO MEDIUM (6/10)
- When the water comes to a simmer, crack the lid open about 1/2 inch gap and start the timer. Steam with the lid cracked open like that for 10 minutes

- After steaming, turn off the heat. DO NOT OPEN THE LID of the steamer. Let the buns sit there for 3 minutes. The buns will not sink or wrinkle due to the sudden change in temperature
- Proceed with the next batch and steam with the same method and setting as I mentioned above. You don't have to wait for the water in the steamer to cool down to start. Just turn on the stove to medium heat, crack the lid open immediately and the time starts when water is back to a simmer again
Serve warm or cool down:
- Serve them while they are warm
Storing:
- If you make extra and plan to store them, let the already steamed buns cool down completely and then place them on a baking sheet, not touching each other, and then put the entire tray inside the freezer for about 1 hour. They will harden, but not completely frozen yet. Transfer to a freezer bag and they will not stick to each other anymore. Try not to keep for more than 1 month
Reheating:
- They can go straight from freezer to steamer when you are ready to eat them. Steam on high heat for 5 minutes and they are as good as new
Extra:
- You can read more details on ingredients, substitutions, variations, and other tips in my post that may answer your questions not covered in the recipe card
RECOMMEDED TOOLS
Marv’s Recipe Notes
- Use potato starch (not potato flour) if you cannot find wheat starch. If you can’t find potato starch, you can use cornstarch, though I highly recommend potato starch instead of cornstarch
- You can use active dry yeast, but make sure to rehydrate the yeast in water or milk with 1 tsp of sugar. It will dissolve and be all foamy, about 10 minutes. If it’s not, your yeast is no longer good. You can add the rest of the sugar into the dough later
- You can also use fresh yeast, the amount would be 4 x the amount of instant yeast. So you’ll need 16 grams of fresh yeast
- I highly recommend testing the yeast for activity before starting to work on this recipe. You don’t want to wait for hours only to find out your yeast is no longer good. Here’s how:
Add 1 teaspoon of sugar and 2 1/4 teaspoons of yeast (one envelope) to 1/4 cup of warm water. Wait for 10 minutes and if you see foams and bubbles and you smell that yeast aroma, your yeast is still good to go. If not, then you need to get fresh yeast. - If not using the dough the same day you prepare it, reduce the amount of yeast to 1/2 teaspoon instead
- You can increase or decrease the amount of sugar depending on if you are making the dough for sweet or savory filling
- I recommend starting with a small amount of liquid and add more as you go because it really depends on the type of flour you use (they absorb liquid differently) and that’s why I can’t give you an exact amount but 180 ml is a good start and add as you go. If you use premixed bao flour, you may want to hold back about 30 ml of the liquid. You can use low-fat, fat-free, or whole milk. The more fat it has, the richer the taste of the steamed buns


328 comments
Thanks for this pao recipe. Will definately give it a try! I’m thinking this pao served with sticky pork belly.. Yum! 😉
yumboo! I’ll eat it with pork belly for sure, dip them into the sauce. OMG! haha!!
i love the crab shape pao!! you’re so skillful 🙂
LOL! I watched the video on youtube on how to make that one! ;b
Steamed buns are my favorite! and i loved the designs you have tried out with them- pure fun!
It has been a long time since I make bao. Your post makes me want to make it again soon!
love making steamed buns I haven’t added baking powder